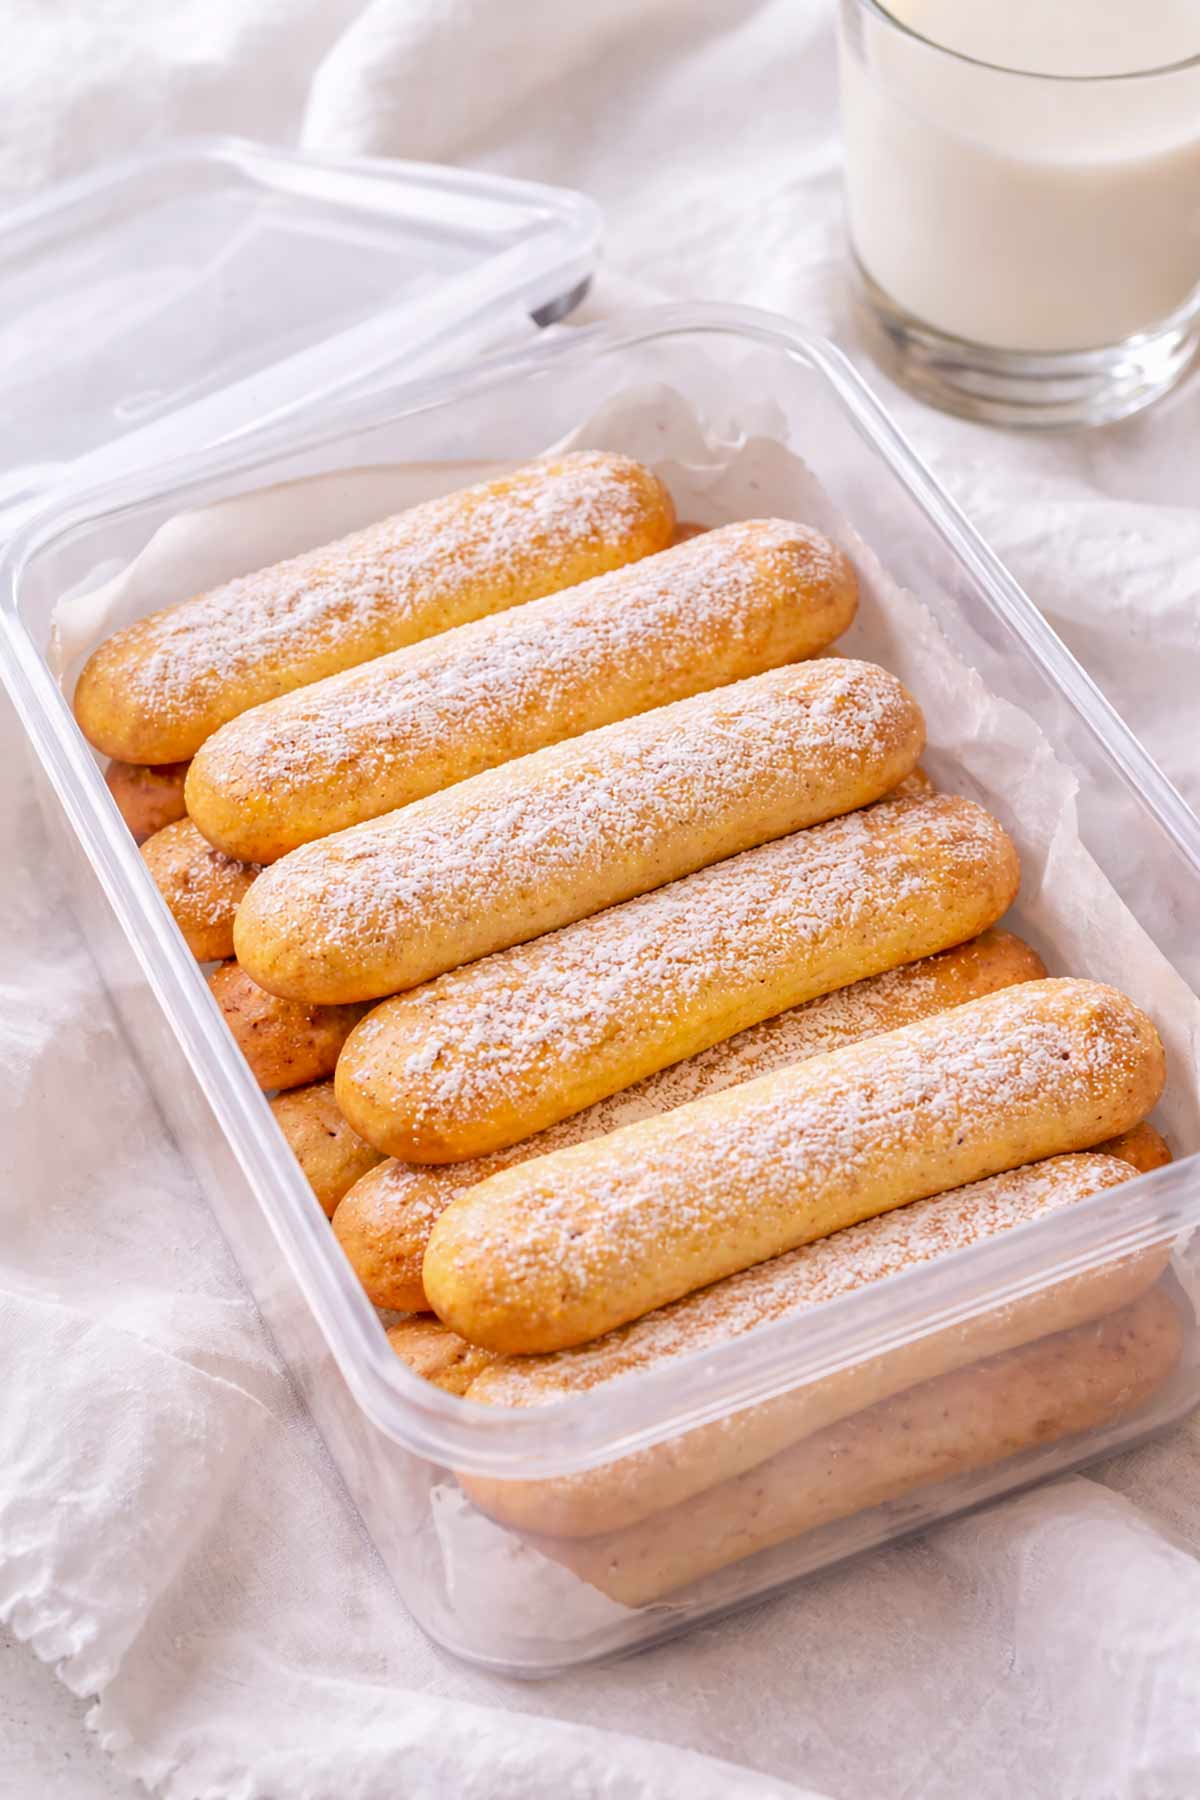
This post may contain affiliate links, please see our privacy
policy for details
Light, airy, and crisp on the outside, these gluten-free ladyfingers are a classic long and finger-shaped cookie made easy. Perfect for tiramisu, trifles, or enjoying with a cup of cappuccino, they hold their shape beautifully while staying soft and delicate inside. No fancy tools? No problem, you can still make them without a piping bag.
Why You’ll Love These Gluten-Free Ladyfingers
Light, airy, and perfectly crisp
Gluten-free and naturally dairy-free
Easy to pipe or shape without special tools
Ideal for tiramisu, trifles, or snacking
3 Tips for Perfect Ladyfingers
Measure dry ingredients accurately: It’s vital to weigh your flour, and sugar using a kitchen scale, or use the spoon-and-level method if you don’t have one. Accurate measurements keep your ladyfingers light, airy, and perfectly textured.
See how airy this gluten-free ladyfinger batter is! Whip, fold, and you’re ready to pipe for the perfect sponge.
Pipe immediately after mixing to maintain airiness.
Pipe perfectly rustic ladyfingers on a parchment-lined tray, no fancy tools required. Hold the bag at a 45° angle for straighter lines.
Double dusting with powdered sugar gives the classic crisp top.
Add the final touch! A generous dusting of powdered sugar gives these gluten-free ladyfingers their classic crisp tops.
Substitutions (My Go-To Swaps)
No tapioca starch? Use cornstarch instead.
Can’t have xanthan gum? Use a gluten-free flour blend without it, and add ½ tsp psyllium husk powder sifted with the dry ingredients to help with structure.
Refined sugar alternative: Fine coconut sugar works (batter will be slightly darker and denser).
Make Ahead
Bake 1 day in advance. Slightly dried overnight, perfect for tiramisu.
Serving Ideas & Recipes Using Gluten-Free Ladyfingers
Why are my ladyfingers flat?
Egg whites were under-whipped or the batter was overmixed.
Why are they dense?
Over-folded flour, stop as soon as no dry streaks remain.
Can I make them softer for tiramisu?
Bake at the lower end of the time range.
Can I pipe rounds instead of fingers?
Yes! Pipe 2-inch rounds and reduce bake time slightly.
No piping bag?
Use a small zip-top bag with a snipped corner, or shape with spoons/offset spatula, slightly rustic shapes still work perfectly.
Tried this recipe?
If you enjoyed these gluten-free ladyfingers, please leave a star rating and review! Your feedback helps others find these recipes. Be sure to FOLLOW US on FACEBOOK or, check us out on PINTEREST. And don’t forget to sign up for our newsletter. We always have something new and exciting for you!
Preheat oven to 355°F (180°C). Line 2 baking sheets with parchment.
2.
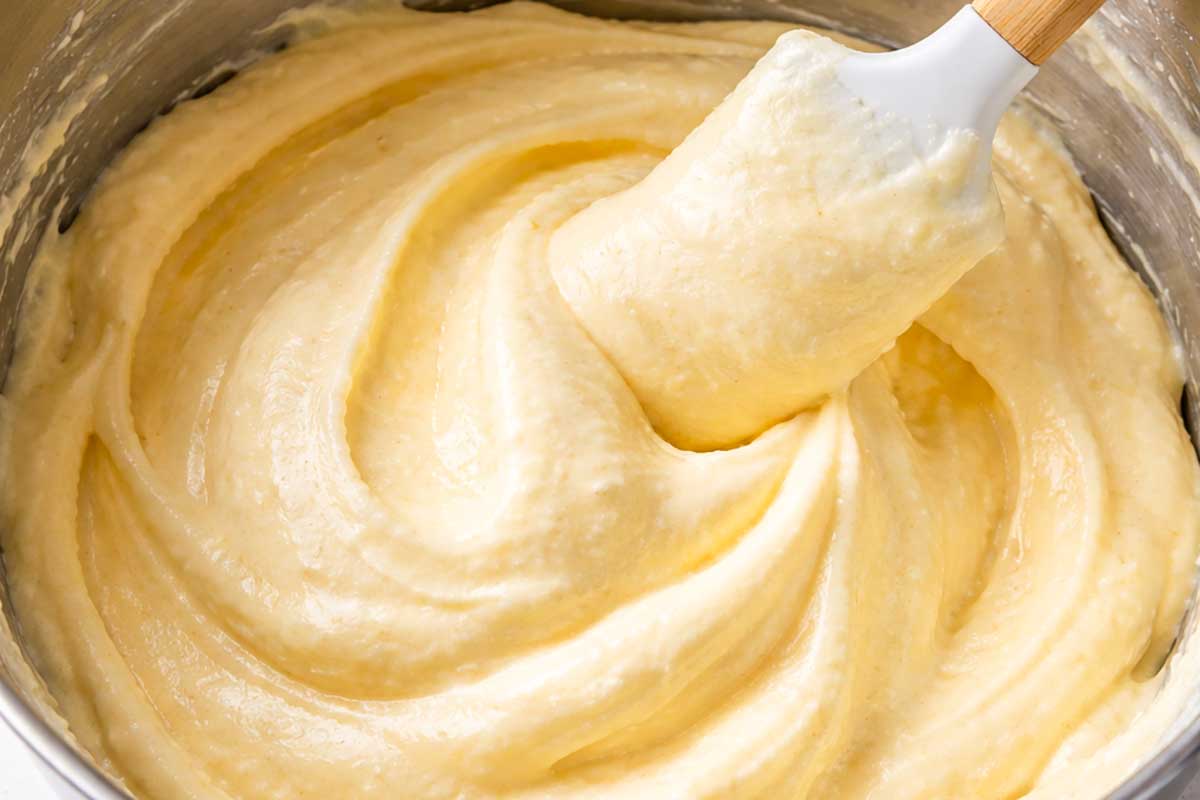
Whip yolks: Beat egg yolks with half the sugar until pale and fluffy.
3.
Whip whites: In a clean bowl, beat egg whites with remaining sugar to stiff peaks.
4.
Gently fold yolks into whites.
5.
Add dry: Sift flour, tapioca starch, and baking powder over batter. Fold just until smooth and airy.
6.
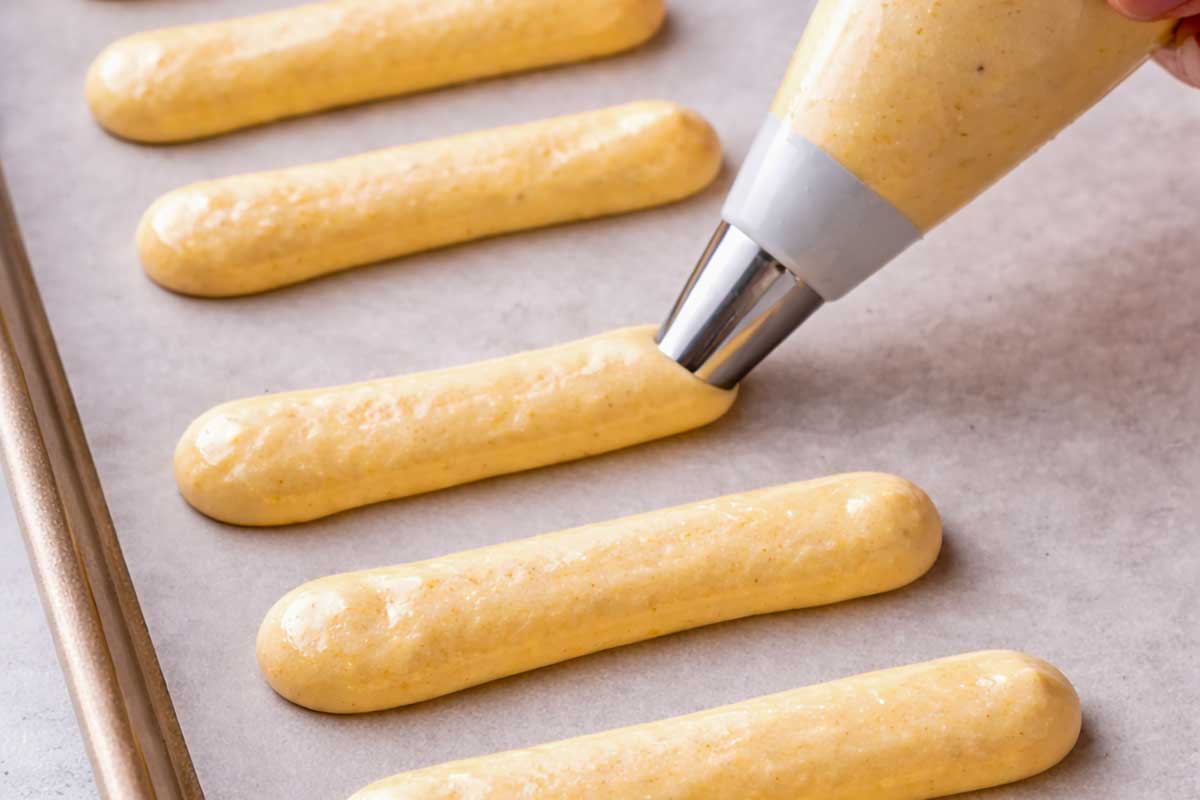
Pipe: Transfer to a piping bag with a large round tip. Pipe 4-inch (10 cm) lines, spacing ¾ inch (2 cm) apart. *see notes replacing piping bag
7.
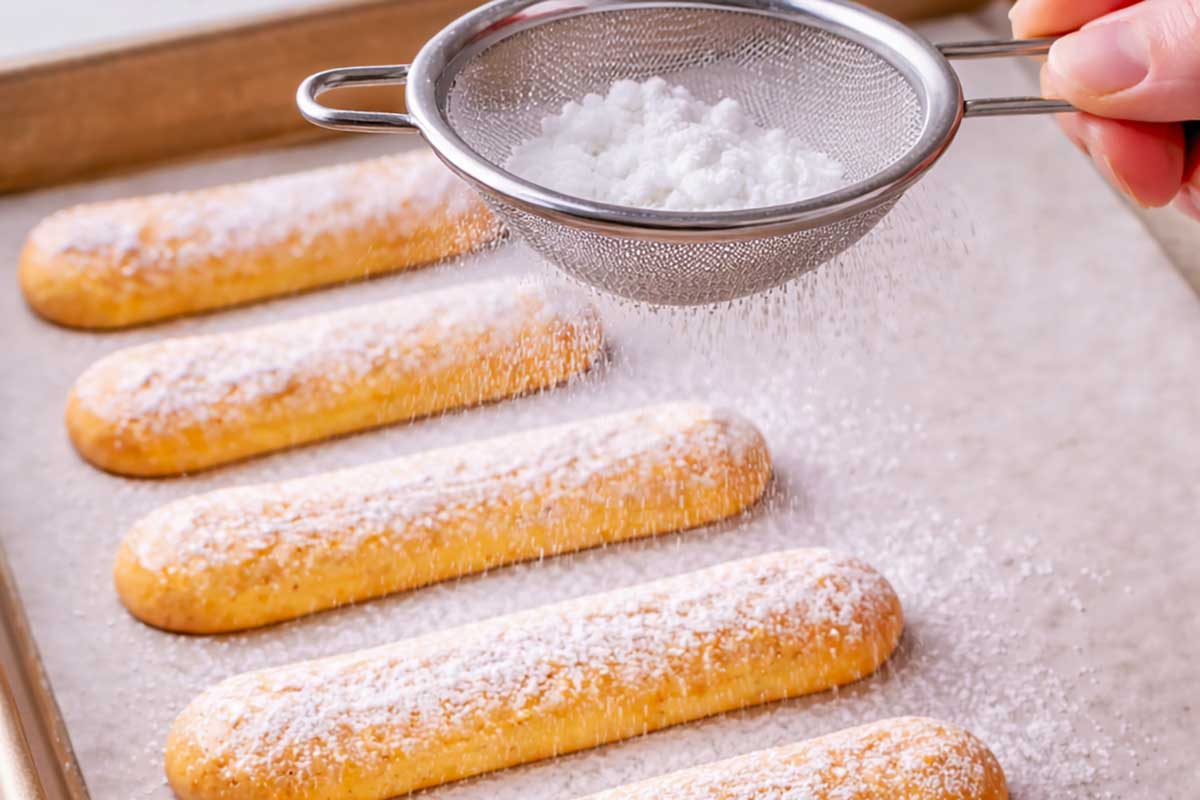
Dust: Generously sift powdered sugar over the tops.
8.
Bake: 15 minutes at 355°F (180°C) then 300°F (150°C) for 12–15 minutes, until set and lightly golden. Cool on the tray.
9.
Once cooled dust with powdered or granulated sugar if you wish
Nutrition Info
Per serving (1/24): 55 calories, 1 g fat, 11 g carbs, 1 g protein, 4 g sugar. | Note: These values are estimates and can vary based on specific brands. Nutrition information is automatically calculated, so should only be used as an approximation.
Leave a Comment
Carlotta
I just made your tiramisu with these ladyfingers, they turned out perfect!!!
Stacy
The ladyfingers turned out perfect, and a lot cheaper than store bought ones, thank you.
Leave a Reply
You must be logged in to post a comment.