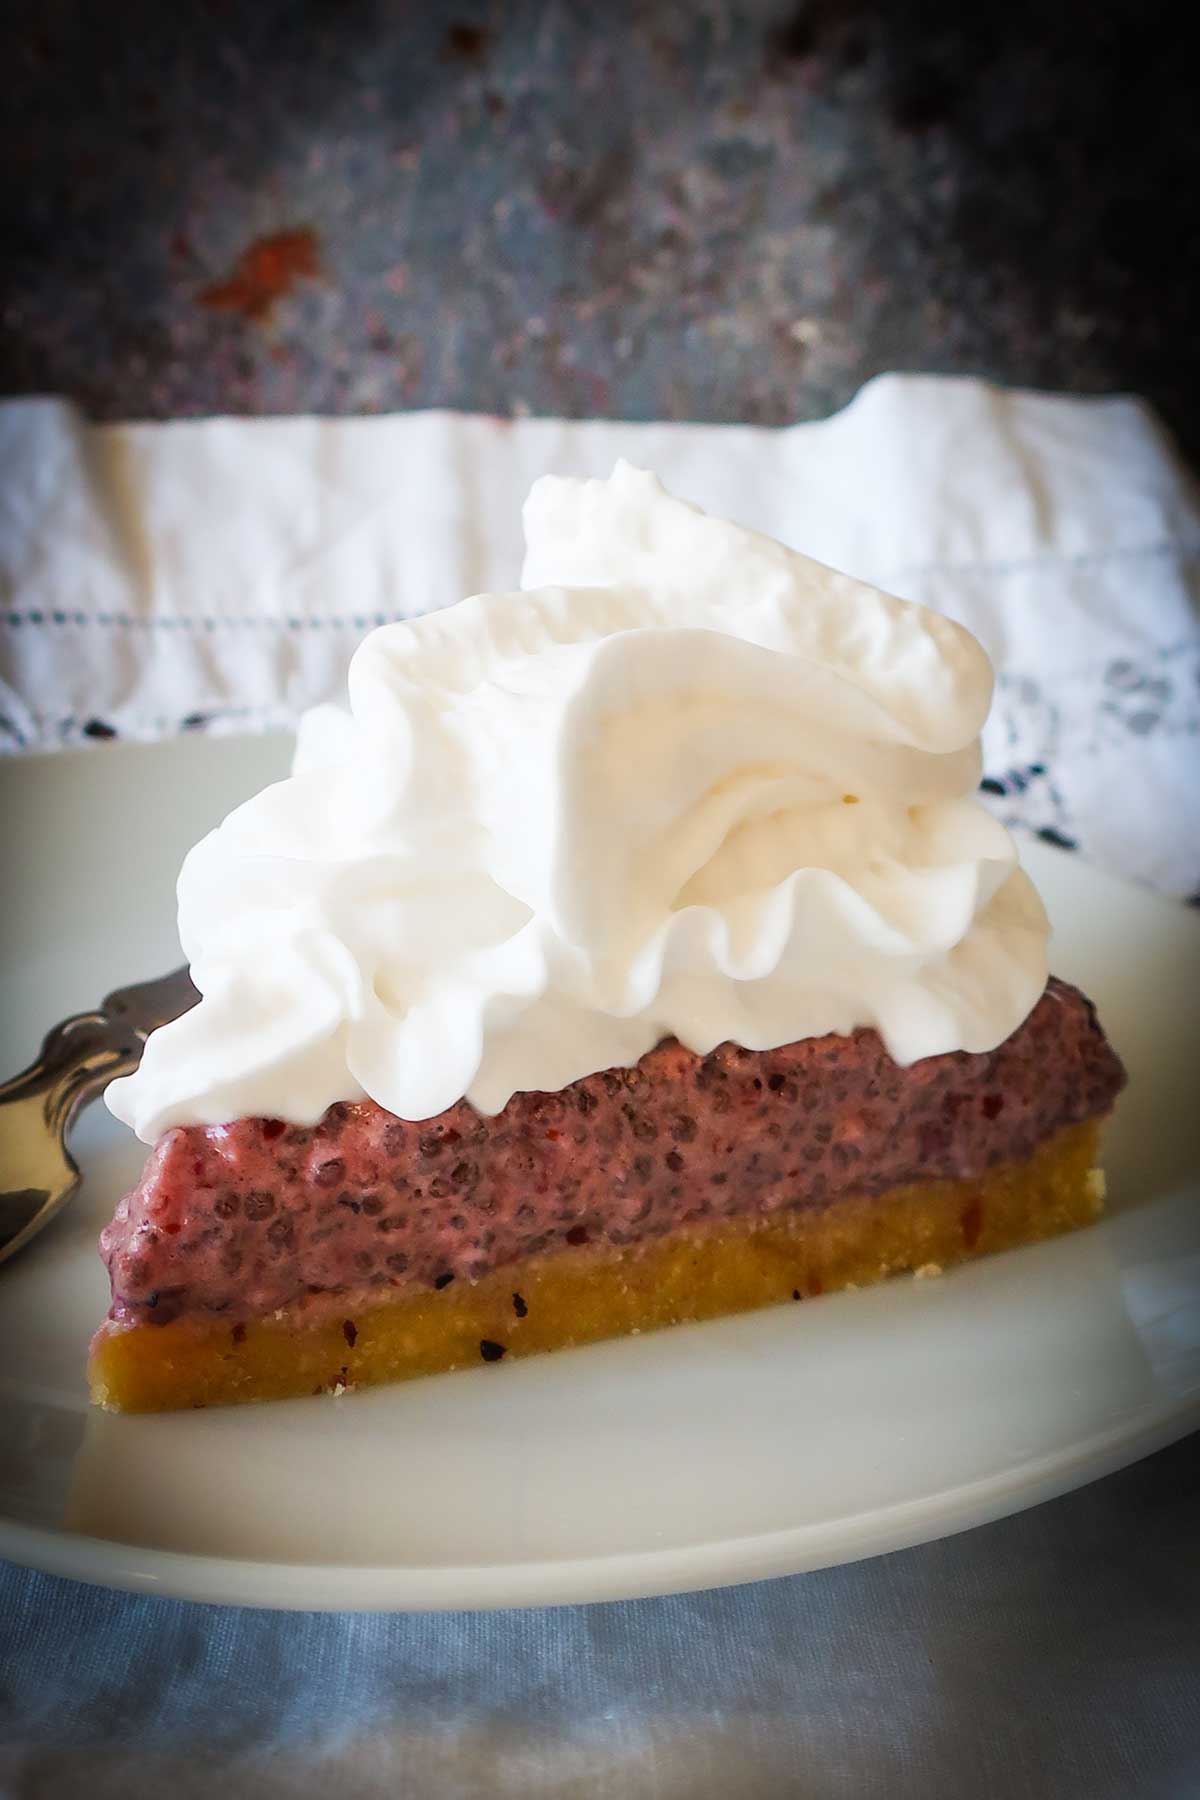


No-Bake Gluten-Free Berry Chia Cake
- Prep Time:
- 15 min
- Serves:
- 6
Ingredients
For the Crust:
1 1/2 cups (150 g) almond flour
2 tbsp (15 g) coconut flour
Pinch of sea salt
3 tbsp (45 ml) maple syrup
3 tbsp (45 g) coconut oil or melted unsalted butter
1/2 tsp pure vanilla extract
For the Filling:
1 1/2 cups (232g) frozen or fresh berries (blueberries, raspberries, strawberries, or a mix)
1 cup (240 ml) coconut milk (or any milk of your choice)
1/4 cup (60 ml) pure maple syrup
1 tsp pure vanilla extract
1 tbsp (15 ml) fresh lemon juice
Pinch of sea salt
1/4 cup + 2 tbsp (66 g) white or black chia seeds
Optional Garnish: fresh berries, whipped cream, yogurt, or vanilla ice cream
Instructions
- Prepare the Crust: Line a 7-inch springform pan with a circle of parchment paper
- Add maple syrup, coconut oil (or melted butter), and vanilla extract. Mix until you have a sticky dough-like consistency.
- Press the dough firmly into prepared springform pan and place it in the fridge while you make the filling.
- Make the Filling: Blend all the filling ingredients (except the chia seeds) in a blender or food processor until smooth and creamy.
- Add chia seeds to a separate bowl, then pour the berry mixture over them. Stir well, then let it sit in the fridge for 30 - 45 minutes. The chia seeds will absorb the liquid and start to thicken the mixture, so don't skip this step!
- Assemble After the chia mixture has thickened, give it a quick stir and pour it into prepared crust. Smooth the top with a spatula.
- Cover with plastic wrap and refrigerate overnight to allow the dessert to fully set.
- Serve and Garnish: When you're ready to serve, garnish with fresh berries, whipped cream, ice cream, or yogurt for a little extra flair.
Nutrition Info
-
Nutritional Value per Serving | Calories: 364 | Protein: 6.5g | Fat: 24g | Carbohydrates: 23g | Sugar: 16g | Fiber: 7g | Note: These values are estimates and can vary based on specific brands Nutrition information is automatically calculated, so should only be used as an approximation


Comments
No comments yet.