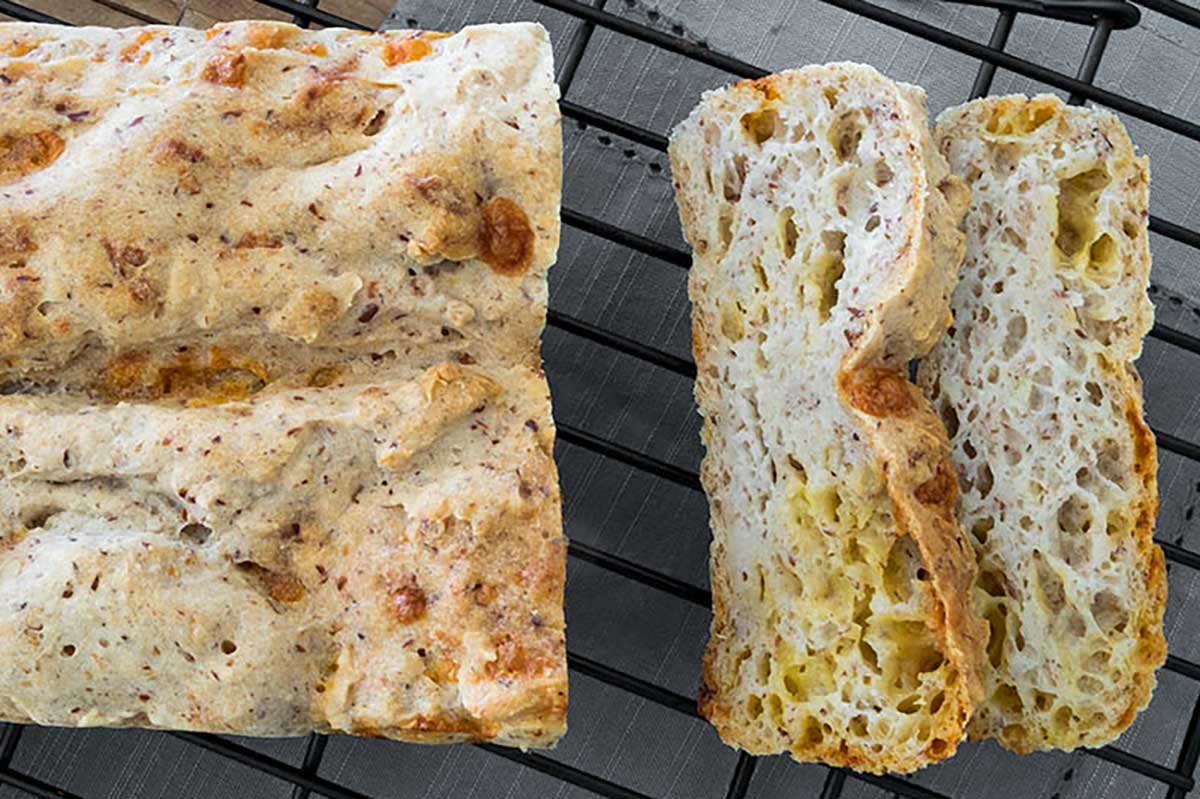
This post may contain affiliate links, please see our privacy
policy for details
In my opinion, most gluten-free breads struggle with texture, but this Olive Oil Cheese Bread is the exception. It features a soft, flexible crumb that doesn’t crumble the moment you slice it, topped with a golden, crispy crust. The combination of olive oil and melted cheddar creates delicious flavor that makes it hard to believe it’s gluten-free. Best of all, it’s an easy bake (I promise) that gives you bakery-style homemade bread.
Why I Love This Olive Oil Cheese Bread!
Perfect Slice: Unlike many GF loaves, I love this one because it is sturdy enough for sandwiches but soft enough for dipping.
Nutrient-Dense: Many GF bread recipes lack fiber and healthy fats, so I wanted to keep it healthy and nutritious which why I added plenty of fiber-rich flaxseed and heart-healthy fats.
No “Specialty” Taste: I wanted it to have a homemade bakery-style flavor, this is why I used blend of sorghum and rice which keeps the flavor neutral and clean.
Double the Reward: And it is always nice to bake once and have an extra loaf for another time. This recipe makes two small loaves, one for now and one for the freezer.
A couple of things to keep in mind when making gluten-free olive oil cheese bread
Potato flour and potato starch are different! Use potato flour rather than potato starch, the flour is essential for providing the moisture and heartier crumb that gives you that traditional wheat loaf texture.
And please, don’t rush the cooling process. I know it’s tempting to slice into a warm loaf, but letting the bread cool completely allows the internal structure to set, and will give you clean, beautiful slices instead of a gummy texture.
Substitutions (My Go-To Swaps)
The Flour: If you don’t have sorghum flour, millet flour is an excellent 1:1 swap that maintains that light, slightly sweet profile.
The Cheese: While sharp cheddar is my favorite, you can swap it for Gruyère for a more sophisticated flavor or Pepper Jack if you want a subtle kick.
Dairy-Free: You can use a high-quality vegan cheddar shreds. However, you can’t replace the yeast, if you do use flax egg or another egg replacement, the bread won’t rise and you will have a dense bread.
Serving Ideas for Olive Oil Cheese Bread
I love using thick, toasted slices of this bread to build the ultimate sandwich with, avocado, tomato, red onions, fresh sprouts and mayo. It is also the perfect “dipper” when served warm alongside a small bowl of high-quality extra virgin olive oil and aged balsamic vinegar.
Ever wonder why this bread has such a satisfying crunch? The secret lies in the starch split. By using a combination of tapioca starch and cornstarch, we get the best of both worlds. The tapioca provides that characteristic “pull” and chew on the inside, while the cornstarch works with the olive oil to create a thin, shatteringly crisp golden crust. It’s a simple technical tweak that makes the difference between a standard loaf and a professional-style bake!
FAQ – Beginner-Friendly Tips
How do I accurately measure the flour? Precision is everything in gluten-free baking. I highly recommend using a kitchen scale for accuracy. If you use measuring cups, use the “spoon and level” method—spoon the flour into the cup and level it with a knife. Never scoop directly from the bag, as this packs the flour and can give in 20% more flour than you need.
Why didn’t my bread rise? This usually comes down to temperature or yeast freshness. Your liquids should be lukewarm (110∘F to 115∘F); if the water is too hot, it kills the yeast, and if it’s too cold, the yeast won’t activate. Always double-check that your yeast is fresh and hasn’t expired for the best lift.
Why did my cheese sink to the bottom? Toss your shredded cheese in a tablespoon of the rice flour before adding it to the batter; this helps it “grip” the dough and stay suspended.
Tried this recipe?
If you enjoyed gluten-free olive oil cheese bread, please leave a star rating and review! Your feedback helps others find these recipes. Be sure to FOLLOW US on FACEBOOK or, check us out on PINTEREST. And don’t forget to sign up for our newsletter. We always have something delicious coming next!
Step 1: Prepare the Bases
Start by mixing 3/4 cup of water with the ground flaxseed and set it aside for 15 minutes to thicken. In a separate small bowl, combine the yeast, 2 cups of warm water, and maple syrup; let this sit for about 10 minutes until it becomes foamy and bubbly.
2.
Step 2: Mix the Dough
Whisk together the olive oil, vinegar, and both the flaxseed and yeast mixtures. Gradually add your dry ingredients (rice flour, tapioca starch, cornstarch, sorghum flour, potato flour, xanthan gum, and salt) one-third at a time, mixing until the batter is smooth. Once combined, stir in the shredded cheese.
3.
Step 3: Proof the Loaves Divide the dough evenly between two greased 8x4-inch bread pans. Cover them loosely with a towel and let them rise in a warm spot for 1 to 1 1/2 hours, or until the dough has risen by about 35%.
4.
Step 4: Bake and Cool
Preheat your oven to 375°F and bake the loaves for 1 hour. Let the bread rest in the pans for 15 minutes before transferring them to a wire rack to cool completely. This wait is vital for the texture, so ensure they are fully cool before slicing.
Nutrition Info
Nutritional Value Per Serving (1 Slice): 190 Calories | 9g Fat | 24g Carbs | 2g Fiber | 2g Sugar | 4g Protein | Note: These values are estimates and can vary based on specific brands. Nutrition information is automatically calculated, so should only be used as an approximation.
Leave a Reply
You must be logged in to post a comment.