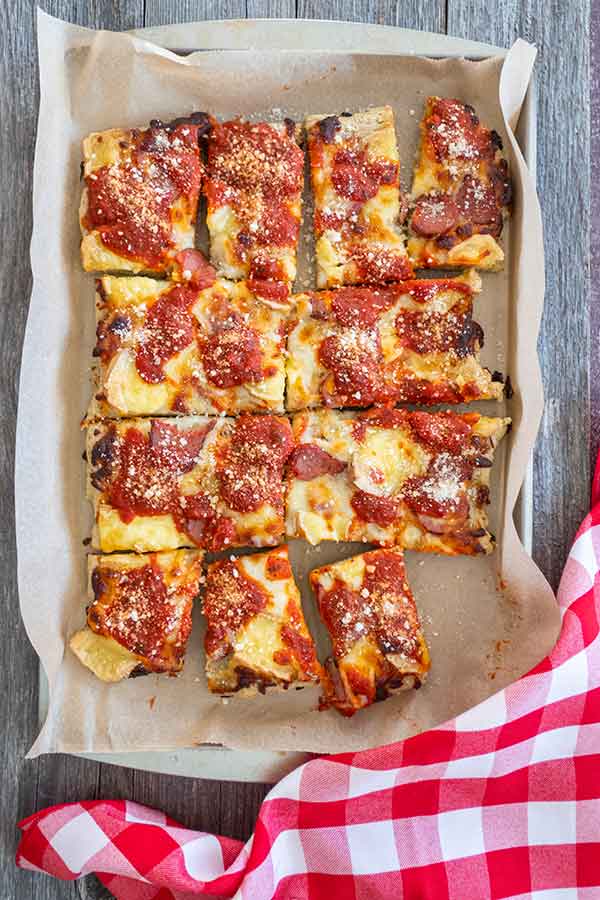
The Easiest Gluten-Free Detroit-Style Pizza You’ll Ever Make
- Prep Time:
- 15 min
- Cooking Time:
- 17 min
- Serves:
- 8
Ingredients
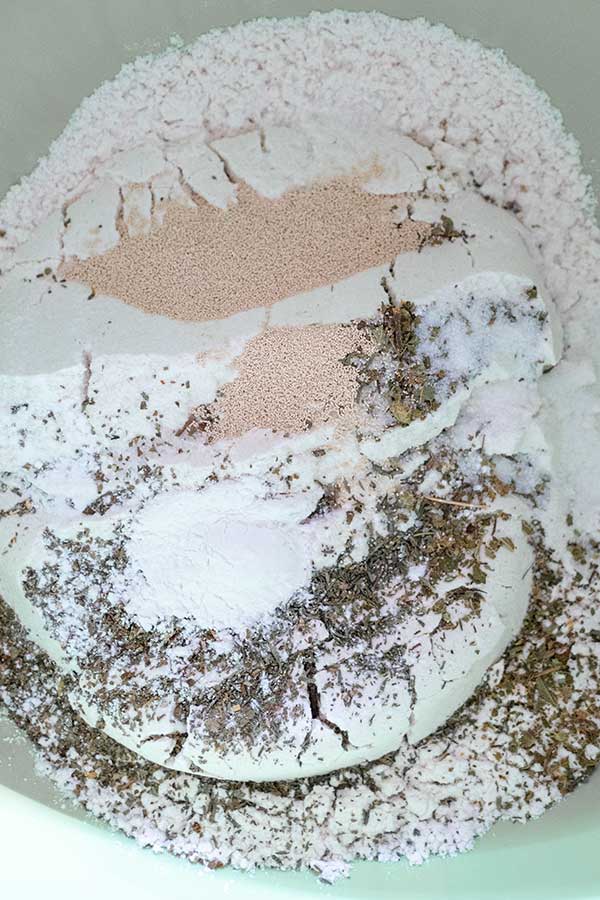
2 1/2 cups (370 g) gluten-free all-purpose flour blend
1 1/2 tsp. GF Instant dry fast acting yeast
1 tsp. GF baking powder
1 tsp. Sea salt
1 tsp. GF dried oregano
1/2 tsp. GF garlic powder
1/2 tsp. GF dried thyme
1 1/4 cups warm water (125 - 130 F)
2 Tbsp. Extra virgin olive oil
1 tsp. Sweetener (pure maple syrup, honey or sugar)
SAUCE
2 Tbsp. Extra virgin olive oil
2 garlic cloves, minced or grated
1 tsp. GF dried basil
1 tsp. GF dried oregano
1/2 tsp. GF red chilli pepper flakes (optional)
2 cups crushed tomatoes
TOPPINGS
8 oz. shredded or cubed mozzarella cheese
8 oz. Wisconsin Brick Cheese or another creamy good melting cheese (Havarti, Provolone, Cheddar, Brie, Camembert), cut into cubes
6 oz. sliced pepperoni or salami (optional)
Instructions
- PIZZA DOUGH
- In a large bowl, whisk together dry ingredients (flour to thyme)
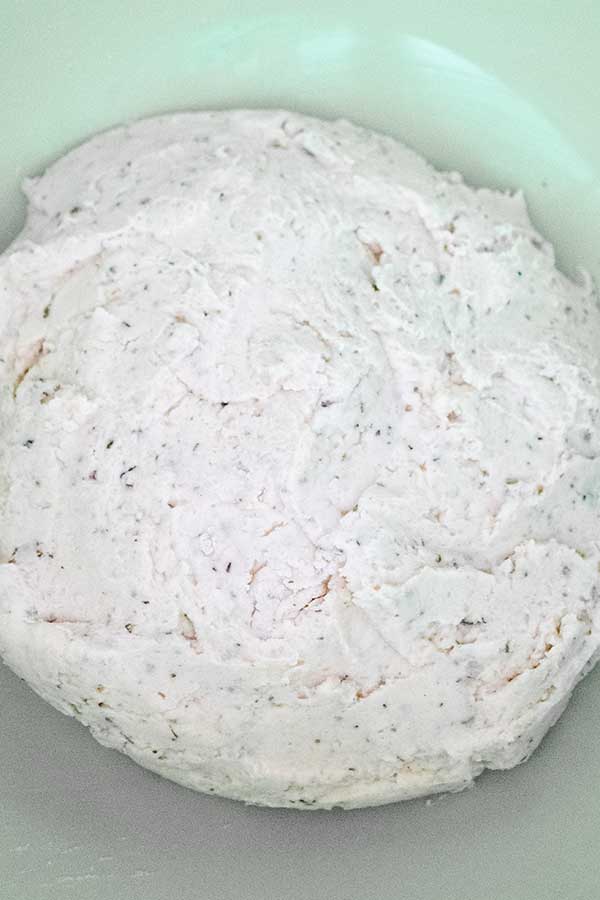
- In a separate bowl, whisk warm water with oil and sweetener and add to dry ingredients. Using a spatula, mix to combine until you form a ball of dough. Loosely cover the bowl with plastic wrap and set it aside in a warm place for 30 minutes to rest.
- Drizzle two tablespoons of olive oil into a Detroit Style pizza pan or a 9x13-inch rimmed baking pan. Place the dough on the olive oil and gently stretch the dough to about 3/4-inch thickness. Loosely cover with plastic wrap and set aside in a warm place for 30 minutes
- SAUCE
- Meanwhile, make the sauce—heat olive oil in a small saucepan over medium heat. Add garlic and spices and stir to combine. Add crushed tomatoes and simmer for about 15 minutes, reducing some of the liquid, set aside
- Preheat oven to 450 F
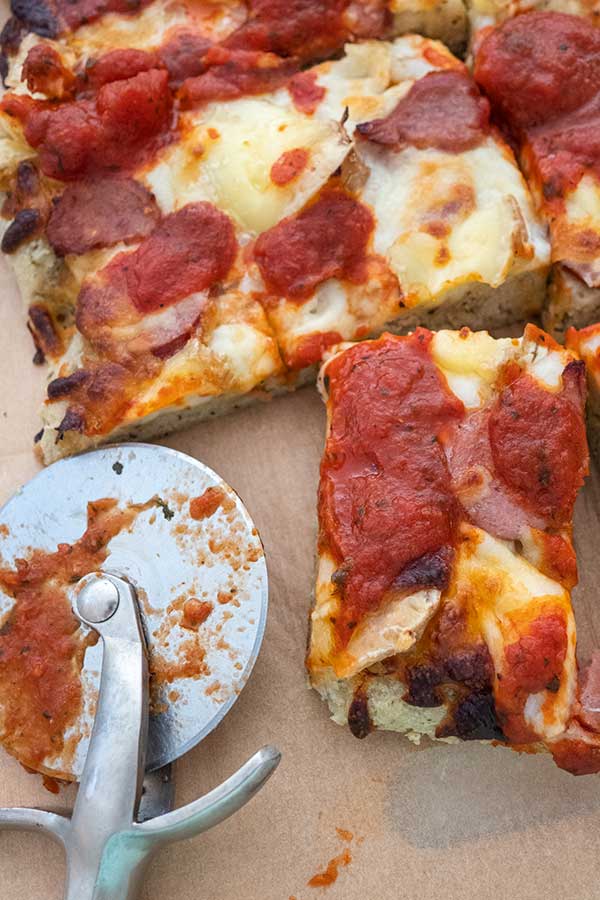
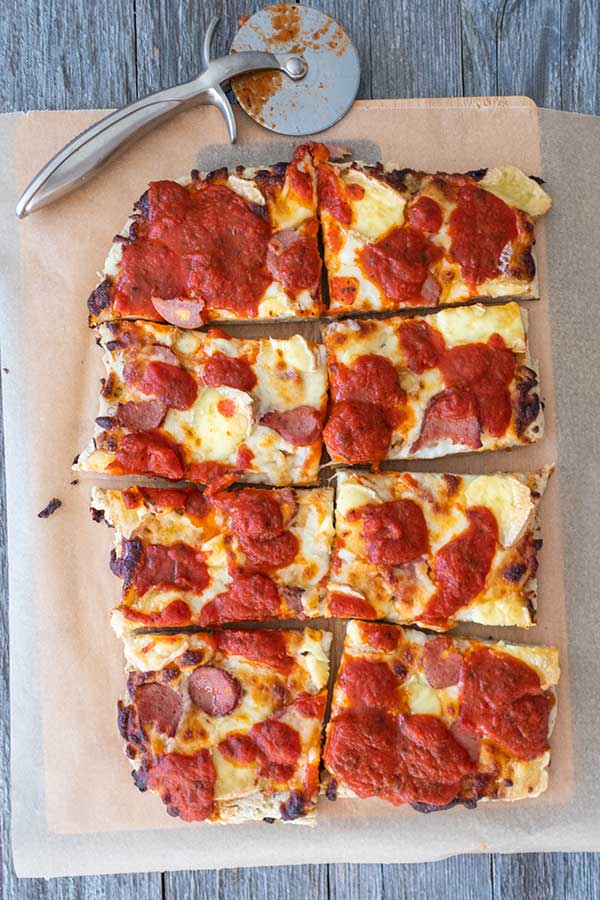
- Top the dough with half the pepperoni, then cheese and finish with the remaining pepperoni. The cheese should spread out to the edges. Bake the pizza on the lowest rack in the oven for 12 minutes. Drizzle with tomato sauce and bake 3 - 5 minutes longer. The cheese should be bubbly, and the pizza crust dark brown and crispy on the bottom and around the edges.
- Rest the pizza in the pan for 10 minutes, then transfer to a cutting board and slice using a pizza cutter


Comments
Samantha
This pizza recipe was so easy, and no need for pizza pan. I often divided the toppings to 3 section, that way everyone in my family is happy.
Jodi
This turned out great! So happy to finally eat pizza again! Crispy and chewy . Thank you!