The Ultimate Cheesecake Troubleshooting Guide
Baking a flawless, bakery-quality cheesecake every time. You don’t need professional culinary training, luck, or fancy kitchen tools to achieve a smooth, velvety finish. It’s all about a few basic rules of kitchen science. Because cheesecake is technically a delicate egg custard rather than a traditional flour-based cake, it requires a unique approach to managing temperature, air, and moisture.
Today, you will learn the non-negotiable techniques required to prevent deep cracks, eliminate lumpy batters, and stop gluten-free or grain-free crusts from turning soggy or crumbly.
Common Cheesecake Failures (and the Science Behind Them)
Before you crack an egg, you need to understand exactly what causes a cheesecake to misbehave. Almost every major texture or structural issue comes down to three variables: Air, Temperature, and Moisture.
- The Problem: Deep Cracks on Top
- The Root Cause: Overmixing (trapping air pockets that expand in the heat and collapse as they cool) OR overbaking (drying out the egg proteins past 160°F).
- The Quick Fix: Keep your mixer on low speed once the eggs are added, and pull the cake out while the center is still wobbly.
- The Problem: Lumpy Batter
- The Root Cause: Cold ingredients. Cold cream cheese is firm and won’t emulsify with sugar and eggs, leaving solid, unblendable pockets.
- The Quick Fix: Ensure your cream cheese, sour cream, and eggs sit out on the counter until they are entirely at room temperature.
- The Problem: Sinking or Deflating in the Middle
- The Root Cause: Sudden thermal shock. Moving a hot cheesecake directly into a cool kitchen causes rapid contraction.
- The Quick Fix: Turn off the oven, prop the door open, and let the cake cool inside the warm oven cavity for a full hour.
- The Problem: Soggy or Crumbly Crust
- The Root Cause: Incorrect crumb texture or poor compression. Too fine turns to mush; too coarse won’t bind.
- The Quick Fix: Finely grind your crumbs, pack them tightly using the flat bottom of a measuring cup, and always pre-bake the empty crust.
1. The Room Temperature Mandate
If you take only one rule away from this guide, let it be this one: Your ingredients must be completely at room temperature before you start.
Your cream cheese, eggs, sour cream, and heavy cream need to sit out on the counter for at least 2 to 3 hours before mixing. Cold cream cheese will break into tiny, stubborn solid pockets that refuse to blend smooth. If you try to aggressively beat the lumps out of cold cream cheese, you will end up overmixing the batter—introducing the exact trapped air that causes cracks.
2. Ban High Mixer Speeds (Air is the Enemy in Cheesecake)
A great cake needs whipped air to rise; a great cheesecake does not. Air pockets trapped in a cheesecake batter will expand like a soufflé in the oven. As it cools, that trapped air collapses, leaving behind deep cracks or a sunken center.
Keep your stand mixer or hand mixer on low speed throughout the entire process. Add your eggs one at a time, mixing just until the yolk disappears. Eggs are excellent at trapping air, so once they hit the bowl, minimize mixing as much as possible.
3. The Gluten-Free vs. Grain-Free Crust Strategy
The base of your cheesecake provides its structural integrity. Because we aren’t using traditional wheat graham crackers, you need to adjust your approach based on the specific type of alternative flour you are building with.
For Gluten-Free Cookie or Cracker Crusts
Store-bought gluten-free cookies and graham styles are notoriously dry and highly absorbent. If your crust is chalky or disintegrates into dry sand when sliced, it lacks binding moisture.
Aim for a “wet sand” texture. When you mix your crumbs with melted butter, press a handful together. If it falls apart immediately, mix in an extra tablespoon of melted butter or a teaspoon of water to activate the binders.
For Grain-Free Nut Flour Crusts (Almond or Pecan)
Nuts naturally contain high amounts of oils. If you use the standard amount of butter called for in a traditional graham crust, the fat will liquefy in the oven, creating a greasy, soggy bottom that leaks out of your pan.
Reduce the added butter slightly compared to a cookie crust; the mixture should just hold together when firmly pressed. Always pre-bake alternative crusts for 8 to 10 minutes at 350°F and let them cool completely before adding your filling. This sets the base and prevents the wet custard from turning the crust into mush.
4. Master the “Jiggle Test” to Prevent Overbaking
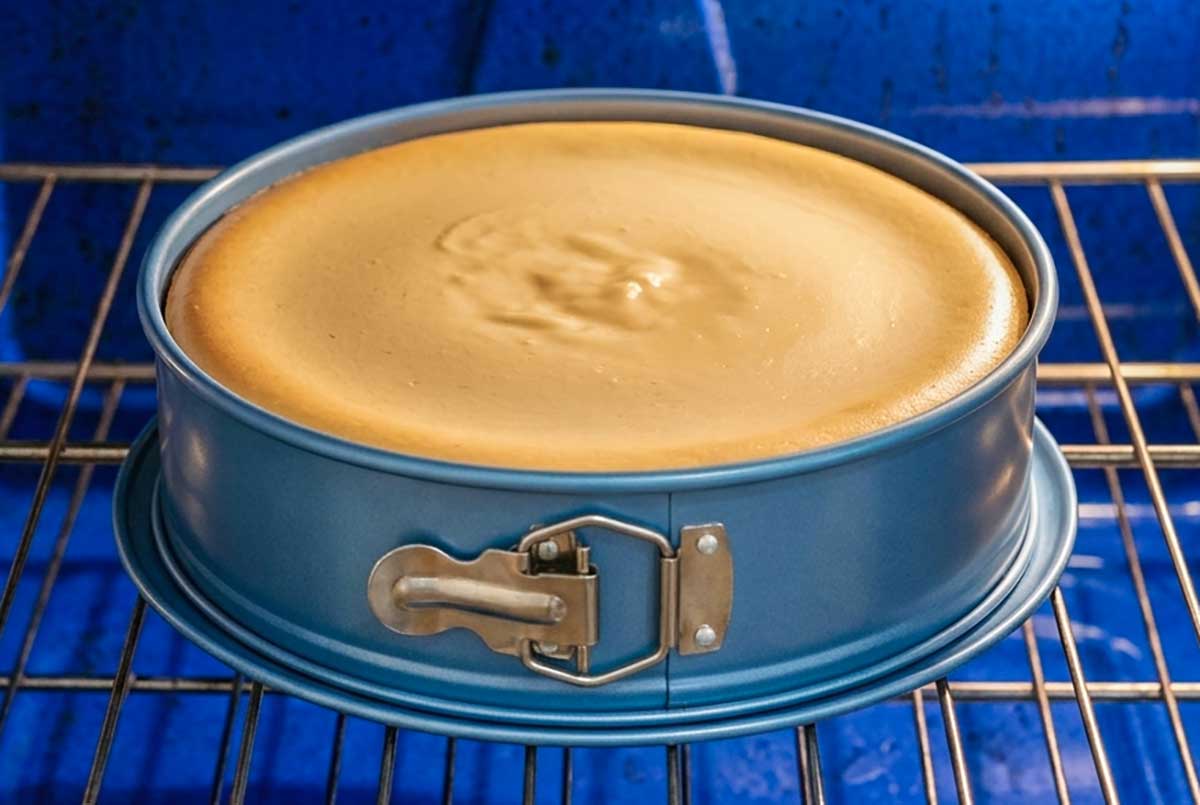
Overbaking dries out the egg proteins, causing them to tighten, shrink, and split. To get that ultra-creamy, melt-in-your-mouth texture, you must pull the cheesecake out before it looks entirely solid.
Gently nudge the side of the baking pan. The edges of the cheesecake should be set, slightly puffed, and matte. However, a 3-inch circle right in the very center should still wobble distinctly, like firm gelatin or Jell-O. That center is not raw; it will carry overcook and firm up perfectly as it chills in the refrigerator.
5. The Gentle Exit (Controlling Thermal Shock)
Sudden temperature changes cause rapid contraction. Shifting a hot cheesecake directly from a hot oven to a cool kitchen counter is a guaranteed way to pull a crack right through the middle.
When the jiggle test tells you it’s done, turn off the oven completely. Crack the oven door open slightly—propping it open with a wooden spoon works perfectly. Let the cheesecake sit inside the cooling oven for a full 60 minutes.
After an hour, move it to the counter to cool to room temperature completely. Only then should it go into the fridge to chill for at least 6 hours (preferably overnight) before you attempt to remove the springform rim.
4 Foolproof Gluten-Free Recipes to Try
Ready to put these rules to work? Here are four distinct, crowd-pleasing recipes that utilize these exact techniques for flawless results.
Grain-Free Amaretto Cheesecake (Gluten-Free)
Just imagine, a dessert so light and airy it feels like a creamy, mousse-like cloud melting in your mouth.This tall, light cheesecake is the ultimate base to practice your low-speed mixing and gradual cooling sequence.
Tiramisu Cheesecake (Gluten-Free)
There are three delicious layers that make up this Italian-inspired dessert. It starts with a buttery chocolate shortbread crust for a rich foundation, followed by a creamy, baked coffee-flavored cheesecake layer and cream and mascarpone topping.
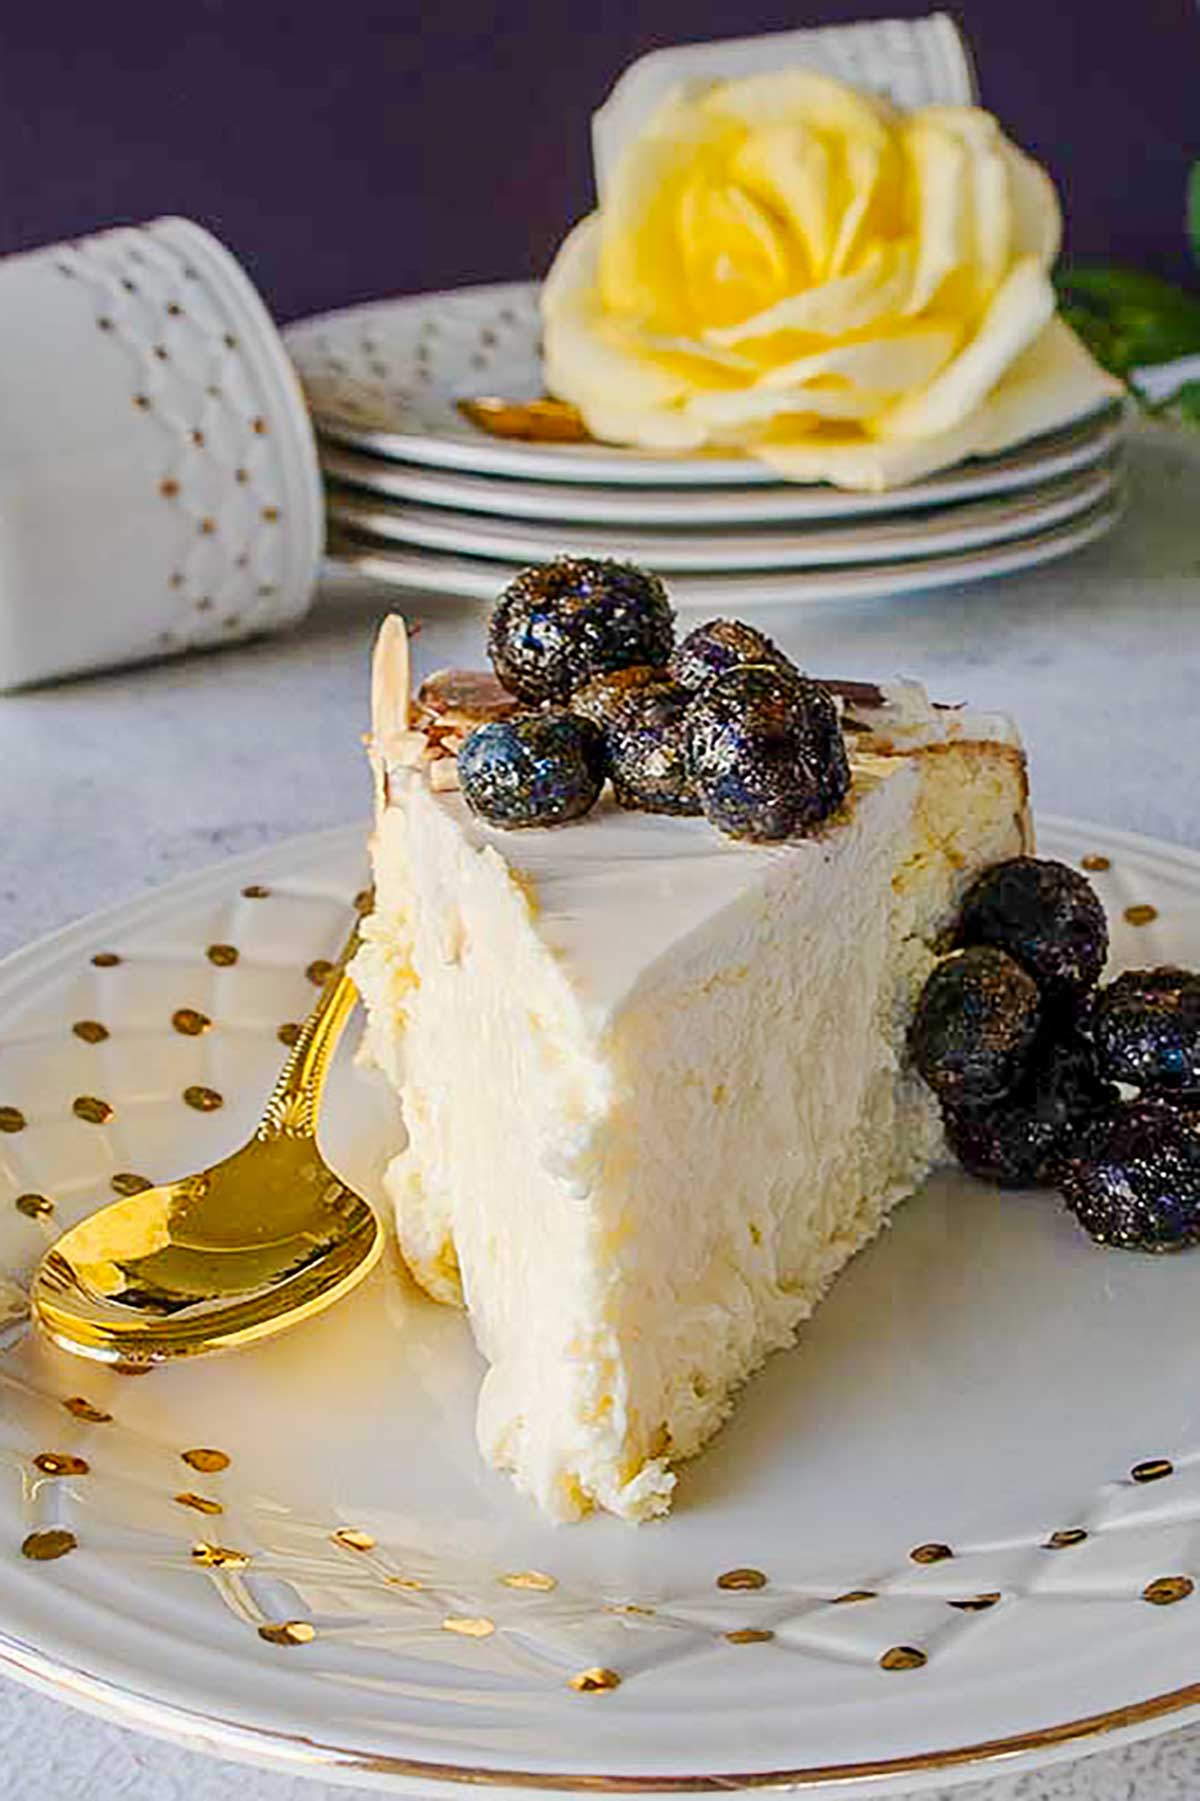
Featured Recipe: Grain-Free Berry Cheesecake Bars (Lighter Recipe)
A reader-favorite lighter option featuring a press-in almond flour crust, a creamy grain-free cheesecake layer, and a vibrant swirl of quick-cooked homemade berry compote and fresh fruit
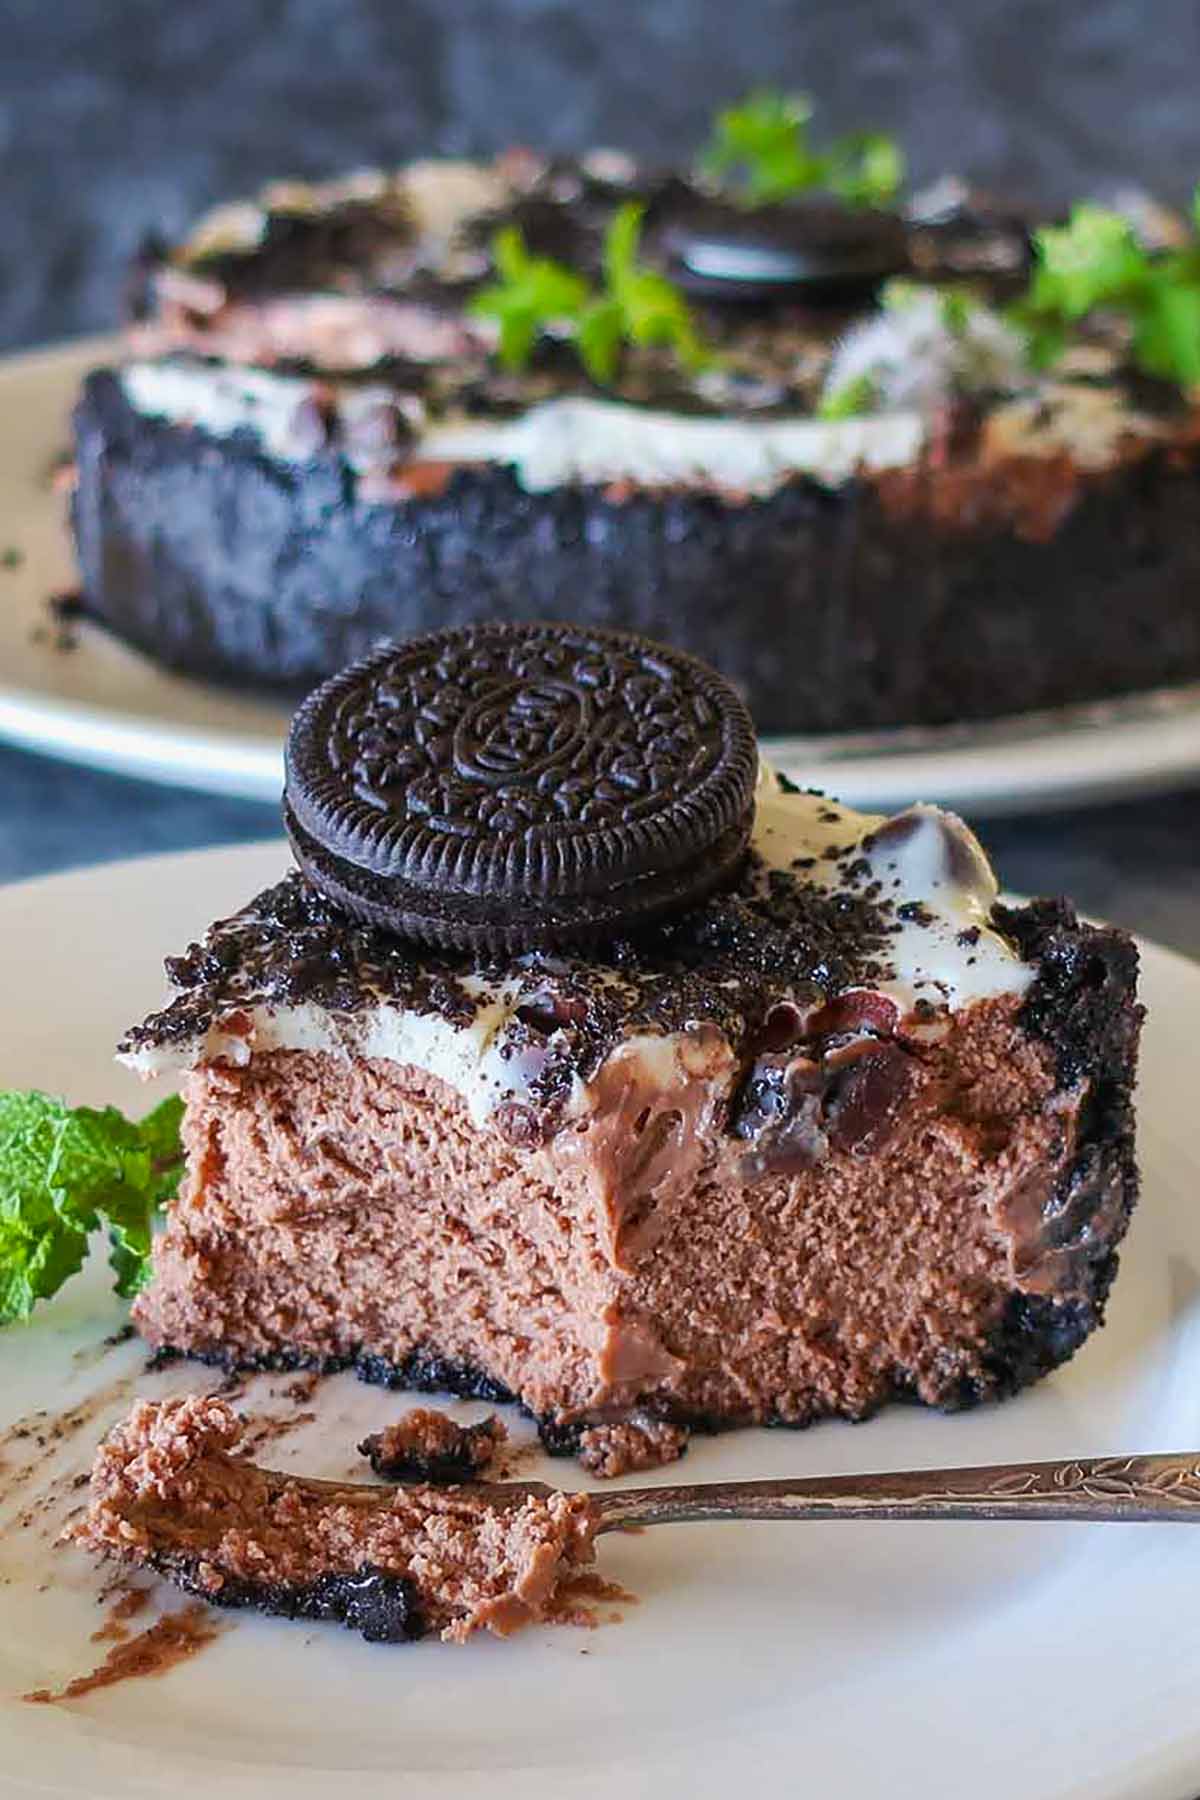
Triple Chocolate Oreo Cheesecake (Gluten-Free)
An Oreo cookie crust, creamy chocolate cheesecake filling, and a chocolate chip creamy topping with a sprinkle of Oreo crumbs make this gluten free baked cheesecake outstanding.
Quick Troubleshooting: Emergency Fixes
What if you followed the rules and a crack happened anyway? Don’t panic. Cracks do not affect the incredible flavor of your cheesecake.
- Quick Ways to Cover a Crack: Cover the top with a vibrant fresh berry compote, a smooth layer of sour cream glaze, or a rich chocolate ganache. No one will ever know.
- The Clean Slice: To get restaurant-quality slices, dip a sharp chef’s knife into hot water, wipe it completely dry, make one clean slice, and wipe the blade clean before repeating.
- The Cheat’s Water Bath: If you want the crack-preventing moisture of a water bath without the risk of water leaking into your gluten-free crust, place a large roasting pan filled with boiling water on the bottom rack of your oven, and bake the cheesecake on the rack directly above it. You get all the gentle steam without the mess.
Ready to Bake?
Baking a perfect cheesecake isn’t about luck, it is a matter of controlling the air in your batter and the temperature of your oven. Keep your ingredients warm, your mixer low, and embrace the center jiggle!