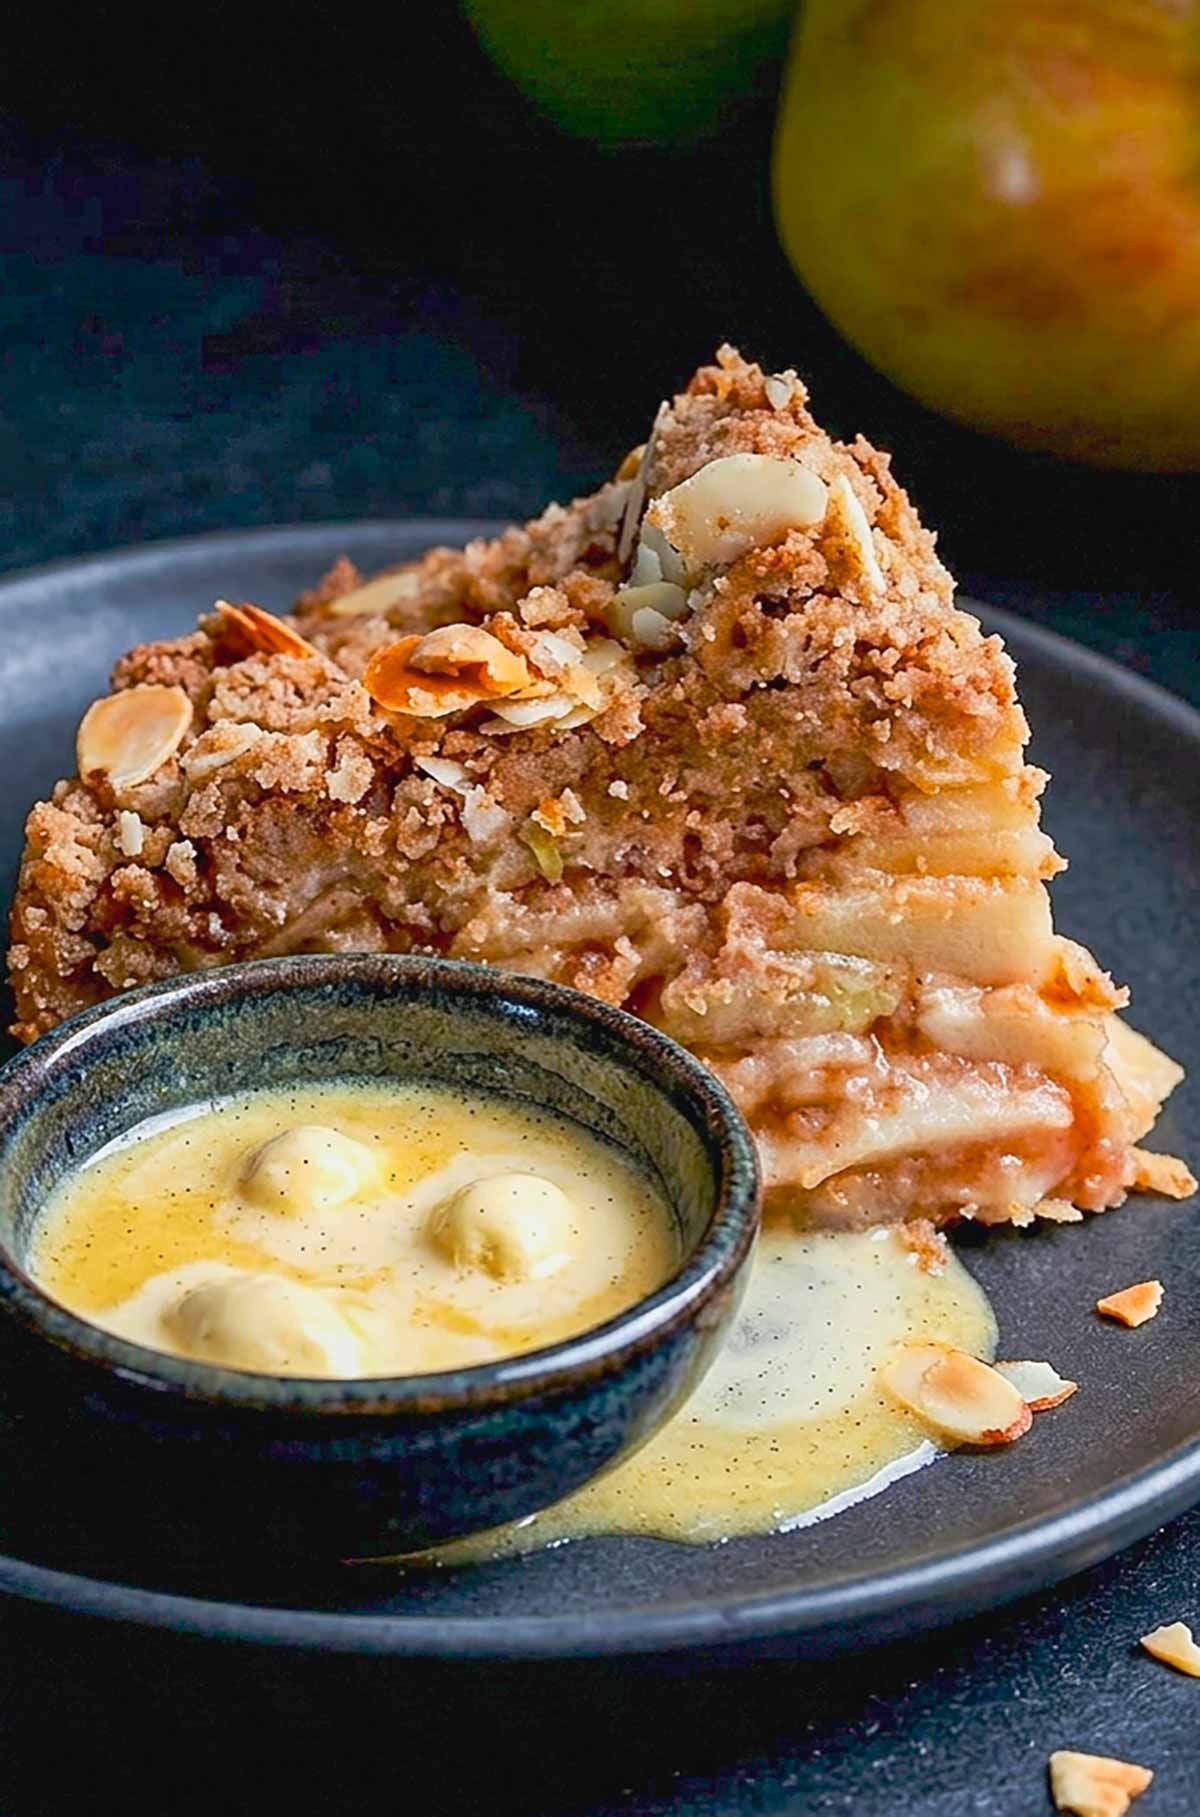
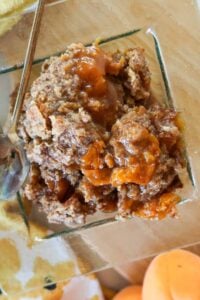
This easy crustless gluten-free apple pie has the fresh flavor of a classic apple pie, with tender, cinnamon-spiced slices of apples coated in maple syrup and lemon butter, and finished off with a crunchy, nutty oat topping. I skipped the bottom crust to make this dessert easy and lower in calories and heavy fats.
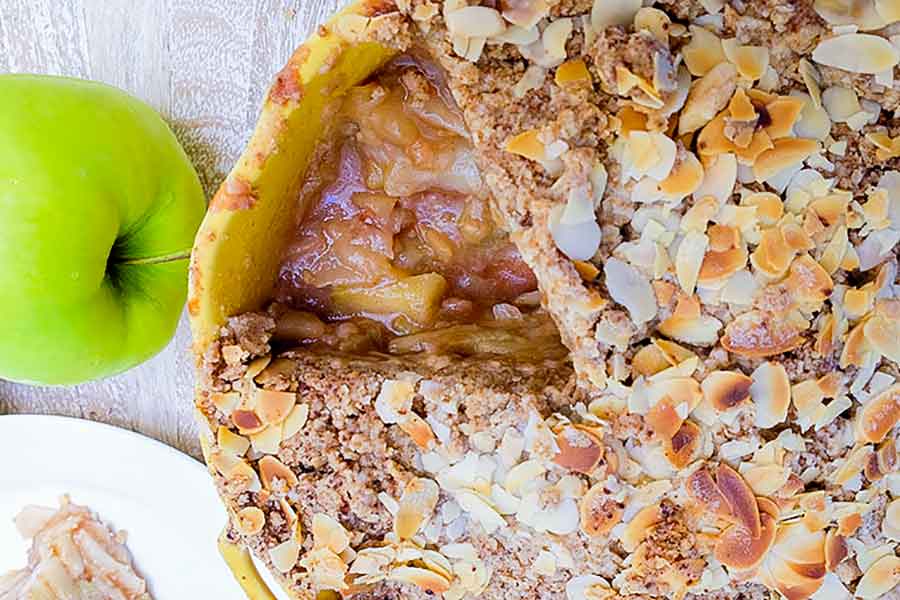
The apple slices are pressed into the pie pan with a small amount of gluten-free flour and oats so the filling bakes down into a dense, sliceable texture that tastes just like a traditional pie filling. The dessert is finished with a distinctively crunchy, buttery oat and slivered almond topping that provides a crisp contrast to the soft juicy fruit.
What is the difference between a crustless apple pie and an apple crisp?
It comes down to the filling texture. In an apple crisp, loose fruit is simply covered with a streusel. In this crustless pie, we mix oats, flour, and butter directly into the apple slices and press them down firmly into a deep dish. As it bakes, the starch binds the juices, creating a dense, sliceable texture that feels just like the inside of a real traditional pie.
Choosing the Right Apple for Baking
When it comes to getting that perfect tender bite, the variety of apple you choose makes all the difference. Some apples turn to mush in the oven, while others hold their shape beautifully. Instead of guessing at the grocery store, head over to my complete guide on which apples to use for baking to see my absolute favorite varieties for pies and bakes.
Easy Swaps for the Oat Topping
If you or someone in your family cannot tolerate oats, you can still achieve a spectacularly crunchy topping without them. Swap the rolled oats in the crumble mixture for an equal amount buckwheat flour or sorghum flour.
My Kitchen-Tested Substitutions for Crustless Gluten-Free Apple Pie
Make it Dairy-Free: Swap the regular butter for your favorite firm plant-based butter stick or solid coconut oil.
Nut-Free Option: If you have nut allergies, leave out the nuts and replace them with an extra 1/3 cup of rolled oats or pumpkin seeds (pepitas) for the crunch.
Sugar Swaps: You can swap the coconut sugar in the topping for packed light brown sugar or date sugar at an easy 1:1 ratio.
How do you thicken the filling without a crust to soak up the juices?
I use a two-part combination of rice flour and rolled oats tossed directly with the raw apples. As the fruit releases its natural liquids, the rice flour and oats absorb the moisture and swell up, creating a rich, thick apple filling.
Are oats really gluten-free?
Oats are naturally gluten-free, but they are frequently grown next to wheat fields and processed on shared factory equipment, read more on oats and why it is so important to buy certified gluten-free.
Kitchen-Tested Tips & Troubleshooting
Why are my apples not fully cooked?
If you pull your pie out and the apples are still crunchy, it usually boils down to two things: slice thickness or baking time. Make sure you slice your apples evenly thin (about 1/4-inch thick). If your apples are cut too thick, they won’t soften in time. The fix: If your nut topping is getting too brown before the apples are fork-tender, tent a piece of aluminum foil loosely over the top shiny side facing out and keep baking for another 10 to 15 minutes.
Why do I have too much liquid in my pie?
Apples shrink and release a surprising amount of water in the oven. If your pie is swimming in liquid, the fruit might have been exceptionally juicy, or the pie was cut while still piping hot. The fix: If you know your apples are very watery, add a teaspoon of tapioca starch to the raw filling. Most importantly, let the pie cool down completely on the counter before slicing. The fruit juices need time to reabsorb and set.
Use a deep-dish pie pan
Because this crustless pie packs a large volume of sliced apples to create its signature, traditional-pie texture, a standard shallow pie pan simply won’t hold it all. Using a deep pie dish ensures you can pack the apple slices tightly and heap on that crunchy topping without any of your filling bubbling over the sides.
3 Great Ways to Serve It
The Backyard BBQ: Serve it right out of the baking dish at room temperature. It holds its shape, won’t melt in the summer shade, and easily feeds a crowd with zero fuss.
The Sunday Classic: Warm your individual slices in the microwave for 20 seconds and top them with a melting scoop of vanilla bean ice cream or a drizzle of salted caramel sauce.
The Next-Morning Breakfast Treat: Enjoy a chilled slice straight from the fridge alongside your morning coffee, topped with a generous dollop of plain Greek yogurt and a sprinkle of extra cinnamon.
Fun Topping Ideas
While vanilla ice cream is the traditional favorite, try switching things up by serving your pie with freshly whipped sweet cream, maple butter, or a sharp cheddar cheese slice for that classic sweet-and-savory combination.
Storing and Make-Ahead Tips
Because this recipe contains no delicate pastry layers to get soggy, no refrigeration is needed on the day it is baked. It holds up perfectly at room temperature all day long, making it an excellent dessert for summer barbecues, family picnics, or neighborhood potlucks where fridge space is tight.
If you have leftovers after the first day, cover the pie dish tightly with plastic wrap and store it on your counter for up to two days. For longer storage, keep it covered in the refrigerator for up to five days. You can enjoy the leftovers chilled straight from the fridge, or pop a slice in the oven at 350°F for a few minutes to crisp up the almond topping.
Are you in the mood of baking a pie today? Check out my collection of gluten-free pie recipes. Our list includes chocolate pies, berry pies and meat pies.
Hi, I’m Kristina I’m a professional gluten-free recipe developer, and every recipe on this site is created and personally tested in my kitchen. If you love this recipe, please leave a ⭐ star rating and a quick review below, it helps other readers find my recipes!
Want more gluten-free inspiration? Sign up for the Newsletter so you never miss a recipe, or join our community on Pinterest, Facebook, and Instagram.
Easy Crustless Gluten-Free Apple Pie
11 reviews
Published Aug 20, 2016 · Kristina Stosek
Prep Time:
15 min
Cooking Time:
65 min
Serves:
6
Ingredients
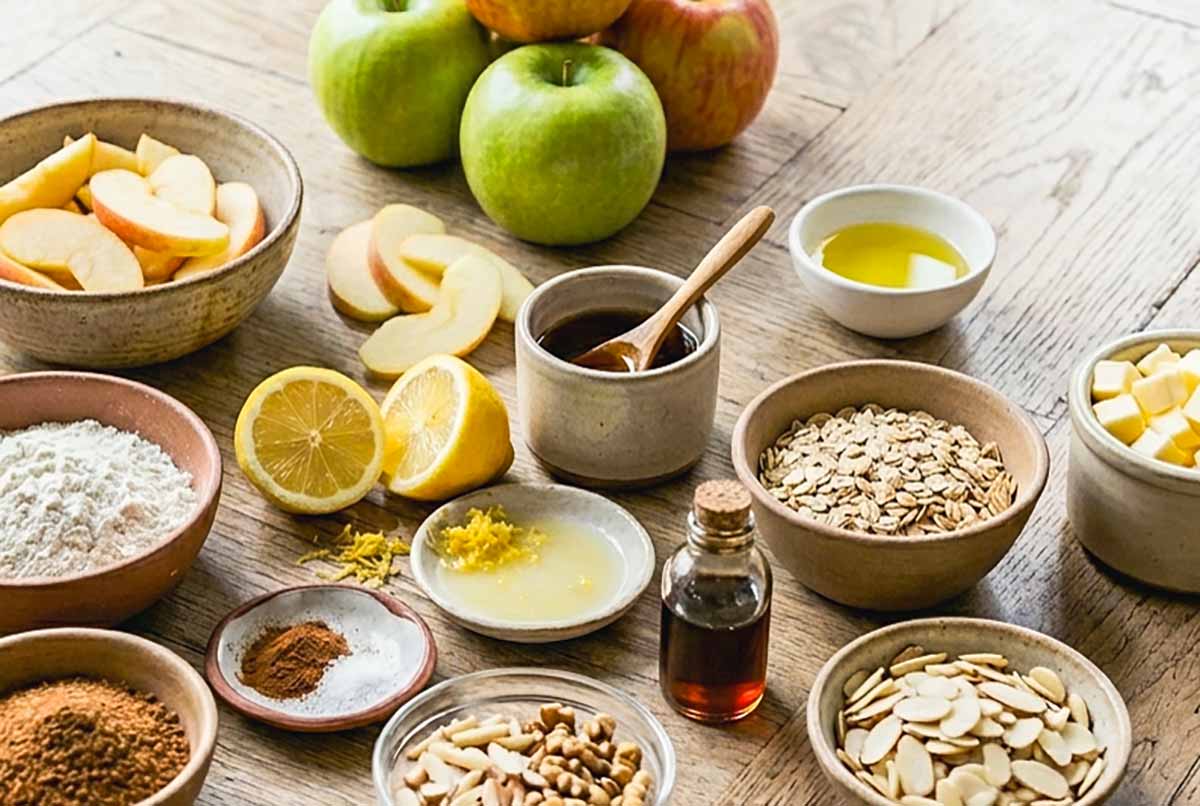
5 cups peeled and thinly sliced apples, (see blog for the best apples for baking)
Prep & Toss: Preheat your oven to 375°F (190°C). Line a flat baking sheet with foil and lightly grease a deep 8-inch pie dish. In a large bowl, thoroughly toss the sliced apples with the lemon juice, lemon zest, maple syrup, cinnamon, oats, rice flour, and small pieces of butter until evenly coated.
Pack the Dish: Spoon the apple mixture into your greased pie dish. Use the back of your spoon or your hands to firmly press the apples down so they are tightly packed and compressed.
Make the Topping: In a separate bowl, combine the flour, oats, coconut sugar, cinnamon, and salt. Work the cool butter chunks and vanilla extract into the dry ingredients with your fingers or a pastry cutter until the mixture becomes crumbly.
Layer & Bake: Scatter the crumble topping evenly over the apples and sprinkle the slivered almonds or walnuts on top. Set the dish on your foil-lined sheet and bake at 375°F for 20 minutes, then reduce the oven heat to 350°F (175°C) and bake for another 45 minutes until the apples are very tender and the edges are bubbling. Let cool completely before serving.
Nutrition Info
Per serving: Calories: 360 Total Fat: 17g Saturated Fat: 8g Carbohydrates: 51g Dietary Fiber: 5g Sugars: 26g Protein: 4g (Note: Nutritional values are estimates per cookie based on using 70% dark chocolate chips and standard raw walnut data.)


Comments
No comments yet.