How to Bake Gluten-Free Without Dry or Crumbly Results
You followed the recipe exactly. You didn’t overbake it. And it still came out dry, crumbly, or stale by the next morning. That’s not bad luck, that’s gluten-free baking working against you because no one explained the rules specific to it.
This guide fixes that. Not with vague tips, but with the specific techniques, ratios, and ingredient choices that change your results.
Why Gluten-Free Baking Goes Wrong
Gluten does three jobs in traditional baking: it traps air, builds structure, and locks in moisture. When you remove it without compensating for all three, you don’t just lose gluten — you lose the entire system holding the recipe together.
The result is baked goods that are dense, gritty, or bone-dry within hours. The most common causes:
- Gluten-free flours absorb 20–30% more liquid than wheat flour, but most recipes don’t account for it
- No binder means nothing is holding the crumb together
- Moisture bakes off faster, so the window between done and overdone is narrow
- A flour blend designed for cookies will fail in a cake, they’re not interchangeable
Fix these four things, and your results improve dramatically.
1. Use the Right Flour Blend

This matters more than any other single decision you make.
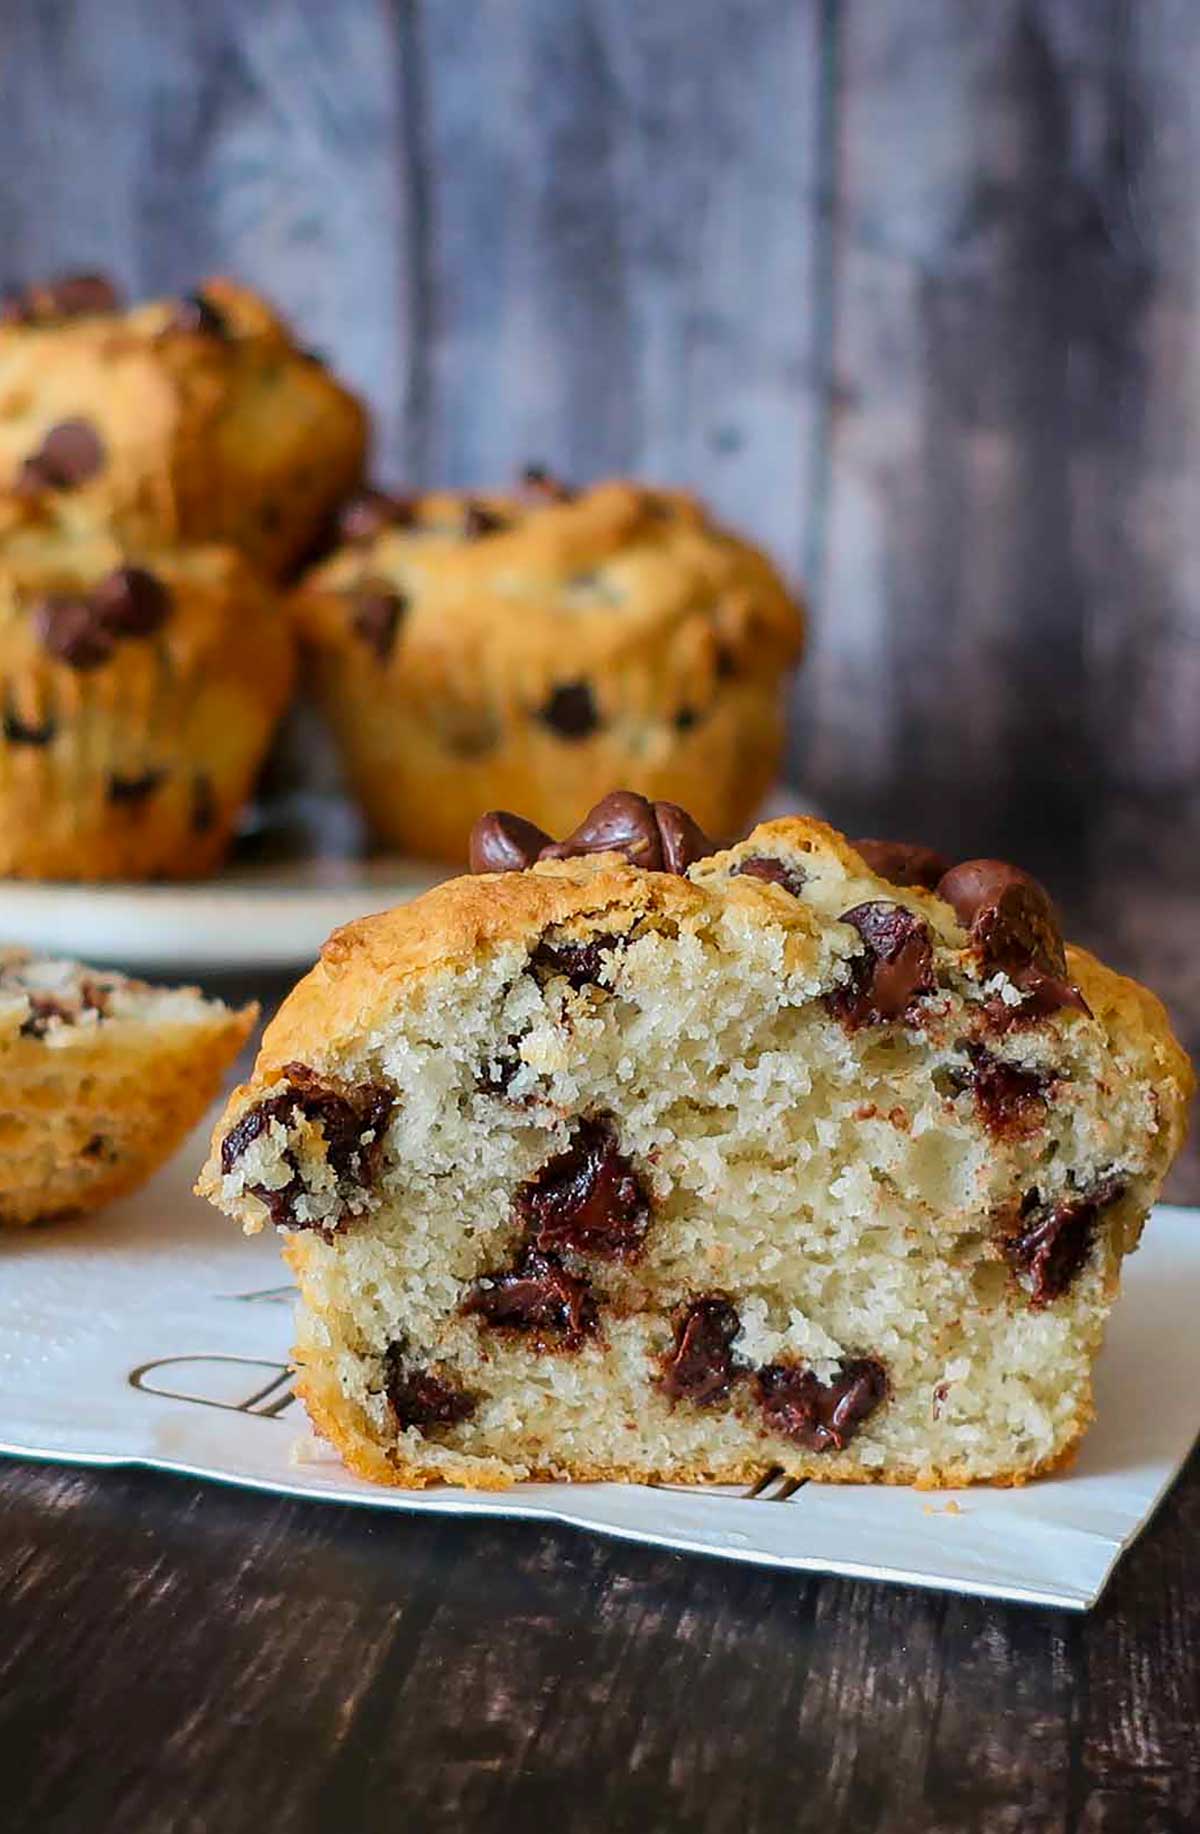
Baking with just one gluten-free flour, almond, rice, oat, almost always leads to imbalance. Almond flour alone produces dense, greasy results. Rice flour alone turns gritty. Oat flour alone is too soft to hold structure.
A reliable blend combines:
- A whole-grain flour (like brown rice or sorghum) for flavor and structure — aim for 50–60% of your total flour weight
- A starch (like tapioca, arrowroot, or potato starch) for tenderness and a lighter crumb — aim for 30–40%
- A binder (xanthan gum, psyllium husk, or similar) — more on this below
A basic starting ratio that works across most recipes: 2 parts brown rice flour : ⅔ part potato starch : ⅓ part tapioca starch. This is close to what most commercial 1:1 blends are built on.
If you’re using a store-bought blend, check the label. If it doesn’t list a binder in the ingredients, you’ll need to add one yourself.
2. Add Moisture Strategically

More liquid isn’t the fix. Lasting moisture is.
Gluten-free flours are thirsty, they absorb liquid fast and keep absorbing as the batter sits. Adding extra water or milk helps in the moment but mostly bakes off. What you need are ingredients that hold moisture through baking and stay soft after cooling:
- Full-fat yogurt or sour cream: Start with ¼ cup per 1 cup of flour blend. Adds moisture, tenderness, and a subtle tang that balances sweetness.
- Oil over butter: Oil stays liquid at room temperature, which keeps baked goods soft for 2–3 days longer than butter-based recipes. Use a neutral oil like avocado or olive oil at the same quantity as melted butter.
- Eggs: Don’t reduce them. In gluten-free baking, eggs are structural as much as they are enriching. For vegan baking, a flax egg works well in muffins and quick breads.
- Pumpkin purée or applesauce: Swap up to ¼ of your fat for either of these in muffins or loaf cakes. They add moisture that genuinely lasts without making the bake taste fruity.
Your finished batter should be noticeably thicker than traditional cake batter, but still pourable. If it’s stiff enough to scoop like cookie dough, it needs more moisture. (Some gluten-free bread recipes are an exception)
3. Always Use a Binder
Without gluten, nothing is holding your bake together. That’s the binder’s job.
Skip it, and cakes crumble the moment you slice them, loaves collapse after cooling, and cookies fall apart instead of chew. Add the right amount, and everything holds.
Xanthan gum is the most common and reliable choice:
- Cookies and bars: ¼ tsp per 1 cup of flour
- Cakes and muffins: ½ tsp per 1 cup of flour
- Breads and pizza dough: 1 tsp per 1 cup of flour
Psyllium husk powder is the better choice for breads and anything that needs a chewier, more elastic texture. Use 1–2 tsp per 1 cup of flour. It also works as a partial egg replacer in denser bakes.
If your store-bought flour blend already contains xanthan gum, don’t add more, too much binder makes baked goods gummy and dense.
4. Measure Your Flour by Weight
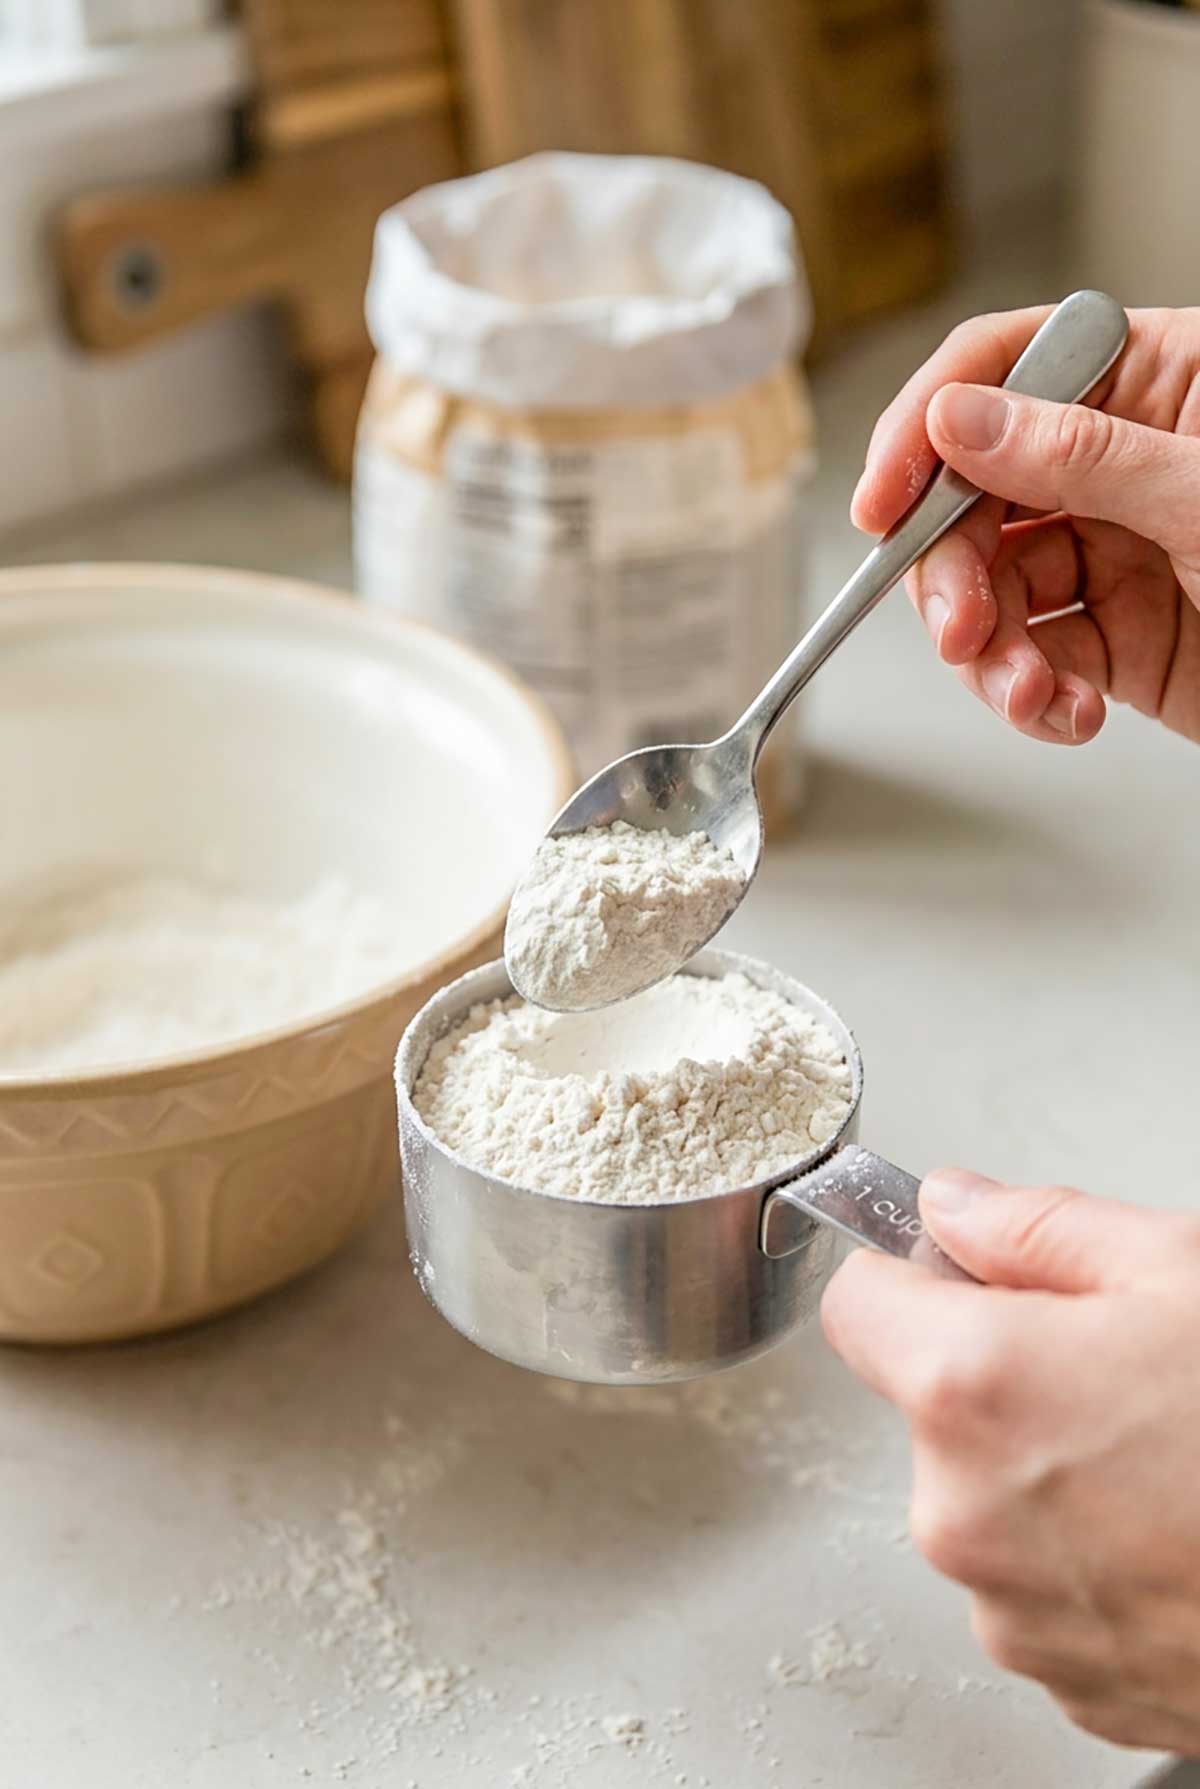
This is the most overlooked fix in gluten-free baking, and it costs nothing to implement.
Gluten-free flours compact easily in the bag. A cup of rice flour measured by scooping can weigh anywhere from 130g to 180g depending on how packed it is. That 50g difference is enough to turn a moist muffin into a dry one.
The fix: spoon flour into your measuring cup and level it off, or better yet, weigh it. Most gluten-free flour blends run between 120–140g per cup. If a recipe gives you a gram weight, always use it over the volume measurement.
A basic kitchen scale costs under $15 and is the single most impactful tool upgrade you can make for gluten-free baking.
5. Pull It Out Earlier Than You Think
Often gluten-free baked goods overbake fast, and they don’t recover.
The visual cues you use for wheat-based baking, deep golden brown, pulling away from the sides, a clean toothpick, often mean you’ve already gone too far with gluten-free. By the time the surface looks done, the interior may be losing moisture quickly.
Instead, look for:
- Edges that are set and firm, with a center that has just a little give
- Light golden color, not deep brown
- A toothpick that comes out with a few moist crumbs, not completely clean
Start checking 5–8 minutes before the recipe’s stated time. Lower your oven by 25°F if you’re consistently getting dry results even when you pull early. Most gluten-free baking does better at 325–350°F than the 375°F many recipes suggest.
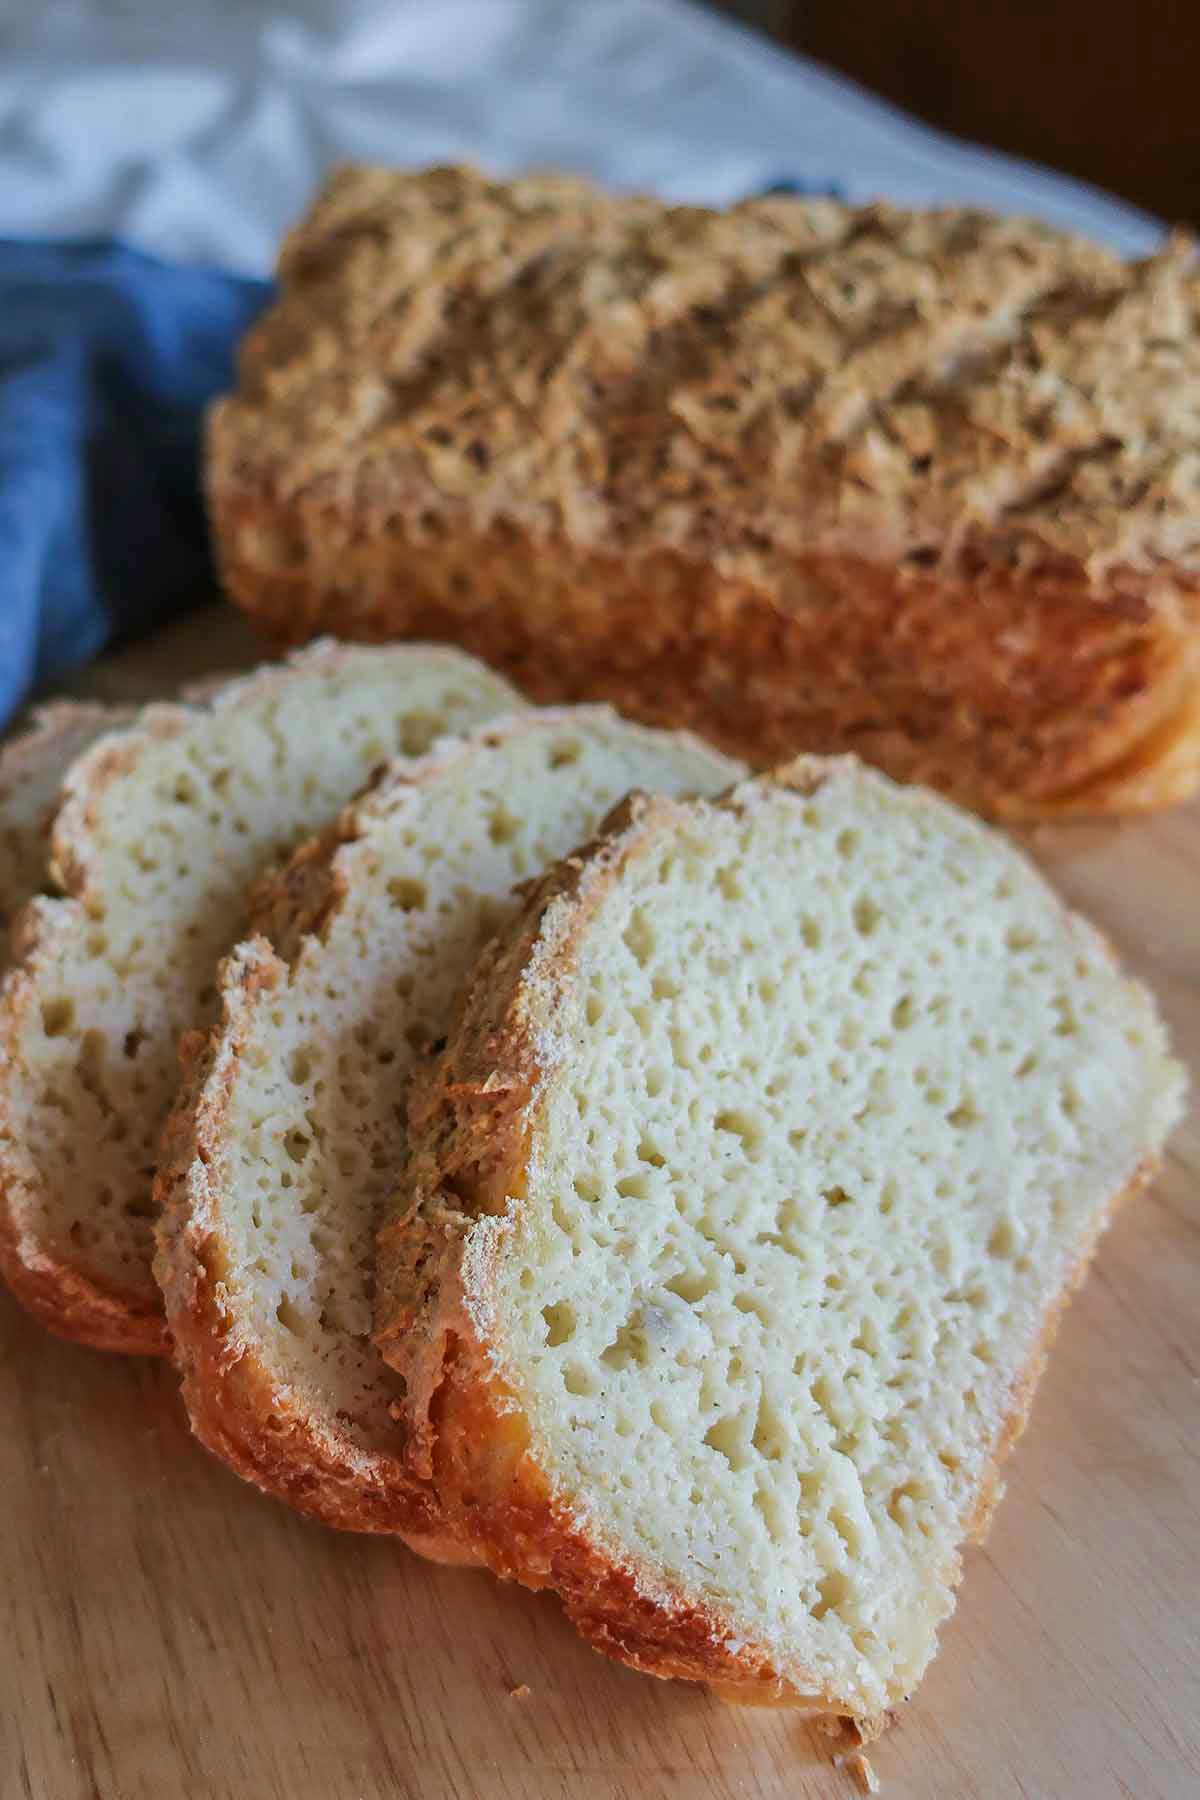
6. Let It Cool Completely Before Cutting
This feels wrong when you want to eat it. Do it anyway.
Gluten-free baked goods continue setting after they leave the oven. The starches are still hydrating, the structure is still firming. Cut into a loaf or cake too early and the crumb hasn’t finished forming — it will seem gummy near the center and fragile at the edges.
For muffins: 15–20 minutes minimum. For cakes and loaves: 45–60 minutes on a wire rack.
The crumb will be noticeably more cohesive, and the texture more accurate to what the recipe intended, if you let it rest fully.
Quick Fixes for Common Problems
Dry muffins The most likely cause is too much flour or overbaking. Add 2–3 tbsp of full-fat yogurt to the batter and reduce your bake time by 5 minutes. If the problem persists across multiple batches, weigh your flour instead of measuring by volume.
Crumbly cake Usually a binder issue. If your blend doesn’t include xanthan gum, add ½ tsp per cup of flour. If it already does and the cake is still crumbling, increase your egg count by one or add an extra tablespoon of oil.
Gritty texture This is almost always the flour blend. Rice flour produces grit when it’s too coarse or used in too high a proportion. Switch to a blend with a finer grind, or let your batter rest 10–15 minutes before baking, this gives the flour time to fully hydrate and significantly reduces grittiness.
Stale by the next day Replace some or all of the butter with oil, and add a tablespoon of honey or maple syrup to the batter, both are humectants that draw and hold moisture. Store airtight as soon as the bake is fully cool.
If It’s Already Baked and Too Dry
It’s recoverable. Try one or more of these:
- Brush the top and sides with a simple syrup (equal parts sugar and water, simmered until dissolved) or diluted honey while still slightly warm
- Wrap tightly in plastic wrap immediately after it cools to trap remaining moisture
- Serve with something wet — yogurt, compote, frosting, or a sauce — which masks dryness and adds back the moisture at the point of eating
Storage
- Cool fully on a wire rack before storing — sealing in residual heat creates condensation and makes gluten-free baked goods gummy
- Store airtight at room temperature for up to 2 days
- Refrigerate for up to 5 days; bring to room temperature or warm briefly before serving
- Freeze for up to 3 months — slice before freezing so you can pull individual portions
The Bottom Line
Dry, crumbly gluten-free baking is almost always a technique problem, not a flour problem. The right blend ratio, lasting moisture, a proper binder, accurate measuring, a lower bake temperature, and patience at cooling — these are the six things that separate a forgettable result from one people ask you to make again.
Get these right, and gluten-free baking stops being a compromise and starts being the thing you’re actually known for.
And since we’re talking gluten-free baking…
I get more questions about gluten-free bread than anything else. It’s the one that trips people up the most, and the one that’s most satisfying to get right.
Here are my 12 best gluten-free bread recipes to put everything from the guide into practice.
Happy Baking!